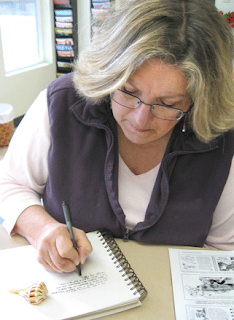
I gave a journaling workshop on
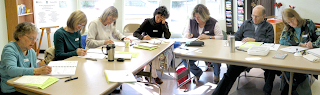
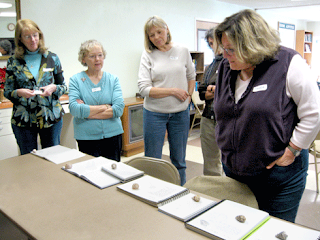
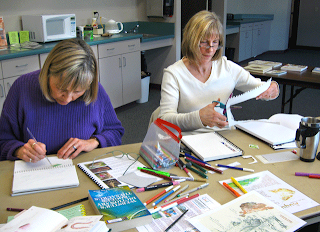
Feb 7 & 8. I was a little nervous because we had two different meeting places for the weekend. I'd never given a workshop in the Senior Center lunchroom, our Saturday venue, and I was afraid it would be clackety. But the big windows and cheery atmosphere proved to be a big plus (and with no echoes) so it worked out great. Here are my students in a composite photo. Remember you can click on photos to get a larger view.
Day 1In
the journaling workshop, we focus on "sketching in your journal" on the first day, and "journaling in your sketchbook" on the second day. So the first day incorporates Beginning Drawing. But because time is limited, it can only be taught in an abbreviated form.
This may take students up only a step or two if they're real beginners. But at least they can learn the principles, and
if they practice they'll improve greatly.
This first day helps students learn to plan pages that will look good, using free-form templates to draw areas into which to write. Matching the shape with the item they have drawn (in the photo above you can see a free-form template's faint outline), this shape allows them to either make
an interestingly-shaped paragraph or lovely curving lines of text.
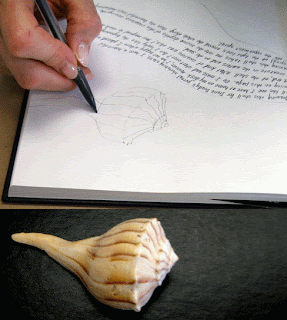
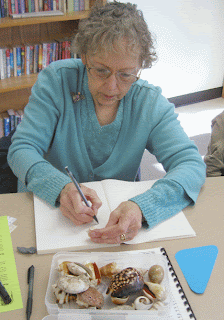
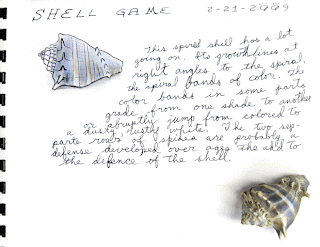
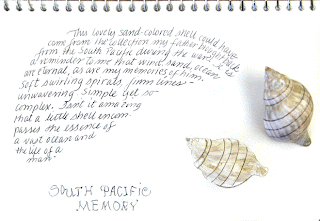
I provided a selection of beautiful but fairly simple seashells, and I think some of the students surprised themselves with both their drawings and their writing. The writing on this first day was unguided, because we were just
feeling out the process of creating and combining journaling and sketches.
Some of the writing results were very evocative, and I realized I had a talented bunch of writers in the class. The drawings were quite good, too, especially for mostly-inexperienced beginning artists.
Take

a look at some of the results here. I wanted to post more, but they take a lot of time to prepare, (as I demonstrated in a previous blog) and I only had time to ready a few of them.
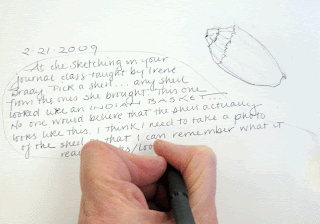
I was
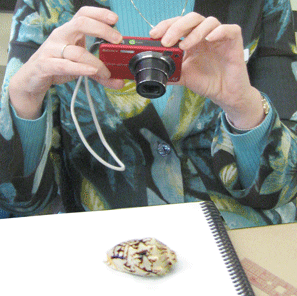
very pleased when one of the students pulled out a digital camera to photograph her shell so that she could work on the pattern and color later. This is an excellent habit, one I use all the time, and it can really enhance your capability for adding details to or painting your sketches later
on at home.
I provided a sample "fun font" for the students to use to create a title for their page.
Our ending critique for the day gave everyone new ideas about ways to tackle a journal sketch and entry, and they were vocal with praise and admiration for the page designs the others had produced ~ and the wildly varied approaches to the writing. It was definitely a successful first day.
Day 2The second day is sometimes met with nervous palpitations by students who have never written a poem,

haiku, or a guided creative paragraph.
Since I don't provide journals for this class, students have to bring their own ~ and every journal on Day 2 was different. There were large ones, small ones, spiral bound and book-bound journals. I provide heavy pages in the back of the workbook for students to use if they decide they don't like the journal they brought. I always request that students bring unlined journals, but a few lined ones generally show up anyway. If students want to use them, they may. However, I discourage this because the lines seriously compromise a sketch.
The first assignment, after an introduction and demonstration of the way to approach the project, was to create an evocative paragraph from their choice of four simple sentences-and-photos provided in the workbook. They drew from the photos, designed their pages with the free-form templates, then created their paragraphs. When they had finished, I asked them to read them aloud, and the entire class was entranced by the readings ~ wow! Some of us were in tears by the end.


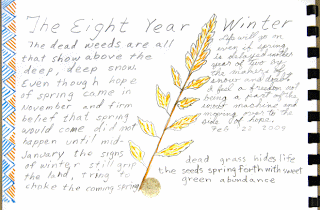
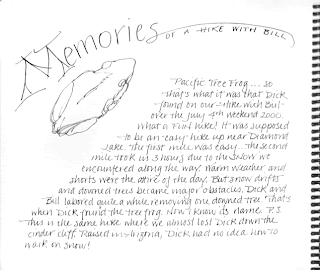
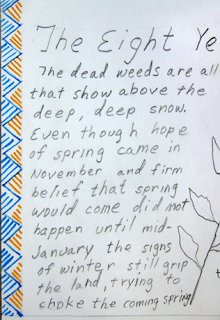
Here are some of their creative pages.

We
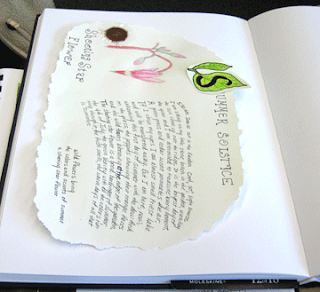
added other things to the pages later: haikus,
experimental borders, etc. I showed them how to cut and paste to mask booboos and attach ephemera. I provided colored sand and a foolproof technique to add a sample.
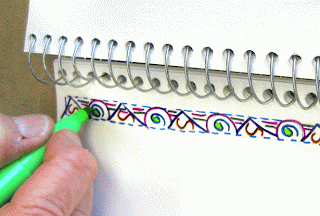
I
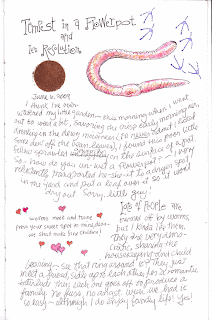
worked alongside them, creating a whimsical page about a worm. I demonstrated details of using rubber stamps, simple spot illustrations, attaching sand, using watercolor pencils for quick touches of color, and creating colorful borders and dividers to enliven a page (check out the example).
The students
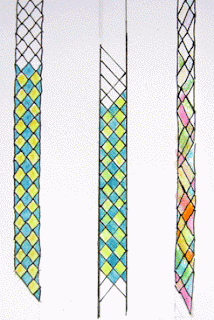
also tried their hand at illuminating initial caps, a cool way to give an average-looking page a real boost. Two of the students had calligraphy backgrounds, and one of them showed us the beautiful and exceedingly easy way to outline words, shown

here.
I always enjoy having advanced artists and journalist in my classes. They often are happy to share with the rest of the students the techniques they use, and I encourage this if it fits within the time frame and other limitations of the workshop.
By the end of the day, most of the students had tried most of the techniques, and several had added circular patches of sand to their pages. There's one by my
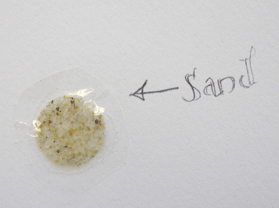
earthworm, above, in case you wondered what that round thing is. And here's a close-up of one produced by a student.
Very soon, now, I'll be posting my new workshops for summer ~ some of them are still in the scheduling phase ~ and I'll try to remember to put up a notice here when I get them posted. Keep in touch!


