To join me on a virtual sketching trip, download a travel sketch-journal here.
I add tutorials to them so you can learn the techniques and details you see in the sketchbooks.

My former workshop students asked me to upload my workshop workbooks to make them available to everyone. So you can also download a workbook and give yourself a workshop! Enjoy!


Thursday, January 29, 2009

Robbie and the Haggis

This post is a bit of an aside, not being about a workshop, but since it happened because of a workshop it deserves its place in the sun. When my last student had gone, after my workshop last weekend, the weather was dim and rainy and I felt in need of a bit of gaiety, so I stopped by The Black Sheep Pub on the way home thinking to have a jar of ale and perhaps sketch the Irish Jam musicians playing their usual Sunday afternoon gig.

Imagine my surprise to find it packed with folk, the Irish music barely audible
from the stairs, and three Scotsmen in plaid kilts standing by the bar! All the chairs were taken ~ I circled the room trying to cadge one from every table, but they were all being saved. So I crept behind the menu board at the top of the stairs and pulled out a folding chair and edged my way back with it to the only free spot remaining (and my favorite place, anyway) right next to the Irish musicians.

Fo
r awhile I just relaxed, for workshops are hard work and it felt good to sip my Guinness and just float with the music. Then I got out my sketchpad and sketched a piper and one of the Scotsmen with his bagpipe. And as things started to get really interesting, I began to write:

"The Black Sheep is dim with late afternoon light. The blue-black ceiling, covered with gold stars, hangs high over the rich tapestry of Irish tunes woven from the warp of fiddle and heavy thumping heels and a weft of flute, guitar, banjo and box. The air is redolent with Guinness and what must be baking haggis, neeps and tatties [I discerned this from a little menu I found on the table].

A fiddler rises, bow flying, from his chair in the group and crouches nearby, all solemn and gay at the same time, to fiddle the tune for a small child, entranced, held in the lap of a listening mother. Other mothers dance with their children in the very small open area, and a colleen with carroty hair jigs with her portly companion, his hand tucked neatly behind him at
his waist in the Irish fashion. Both of them are improbably light on their flying middle-aged feet. All around me, toes tap, fingers jig on tabletops. My foot wags to the beat.

As I sit, the Scottish trio, with humming drone and a screeling of pipes, circles the pub behind a waiter bearing a silver platter of haggis, to deliver it, all brown and steaming, onto the next table.

Now our Jim Finnegan has declaimed
Robbie Burns' famous ode to haggis with marvelous verve to great applause, and one of the pipers ceremoniously stabbed the great roll roundly with a big knife. Finally a kitchen drudge has marched off to the scullery with it to serve it up, with neeps and tatties, to the folk who would have some.

In case you wonder, haggis consists of a finely ground mash of suet, oats, liver, kidneys, heart, blood and possibly tripe of the sheep, heavily spiced and stuft into a sheep's stomach, then baked. On the menu 'tis offered as:
"Haggis wi'
Bashit Neeps and' Champit Tatties, $12.50."

I shall have some.


The Irish Jam strikes up again, the Scotsmen
having sat down to await their treat. My Guinness stands at half mast as I eagerly await my haggis and tatties. The very air vibrates with heel thumps, heavy strumming of guitar, voices shouting to be heard, and the swirling fiddle and pipes. Laughter rises and dances around the ceiling, weaving through the painted stars (my, that Guinness is good!), as the bagpipe drummer clicks his "spoons" idly, and waiters thread their way through dancers and laughing revelers.

AHH! My Haggis, Bashit Neeps (bashed turnips) and Champit Tatties (champed potatoes) has arrived, and I am savoring it. There is much ado about whether haggis is actually edible, and I am here to tell you that "aye, 'tis good!" How could this Scotch-Irish girl reach this advanced age before getting her first taste? 'Tis spicy and musky, hot and steaming, and truly, most excellent.

Jim Finnegan just sang 'My Heart's in the Highlands" in a voice fit to be heard the entire length o' th' green, followed by 'Auld Lang Syne' joined by the entire pubful of roistering folk. The bagpipes came in on the last verse, and it ended with hoots and hollers, shouts and whistles.

It's after five, now, and the bagpipers have begun winding a final path through the pub, screeling and tat-a-tatting as they play 'Scotland the Brave' on their way to the door.

It's time for me to go home. What a wonderful unexpected celebration for this tired lady on a rainy January Sunday evening!
"


Later this week I hope to get up the pictures and entry about the last workshop. I tried several new things, and I think you'll enjoy seeing how they came out.

Tuesday, January 20, 2009

Nature Sketching Basics Workshop ~ 1-10&11-09

I finally got smart and started taping up a welcome sign to the entry of whatever building I'm giving my workshops in. It's eye-opening how many students have mentioned being glad to see the sign! It's printed out on my computer then slipped into a plastic page protector. I fasten it to the door with tape which has one end folded over to make a tab. When I take the sign down I fold over and press the sticky part to the plastic envelope, so that the next time I want to use it I only have to pull up the tab, the sticky area comes up, and I have an instant sign hanger. Click on the image to see a bigger version

While I was photographing that welcome sign, I also took a snapshot of my Basic Sketching Workshop gear in front of the building. The wheeled pack in front is my Drinks Caddy. It has a pullout handle, and contains my electric teapot, instant coffee, teabags of all kinds, hot/cold paper cups, and creamer. It gets quite a bit of use in some classes, in others it is barely used ~ except by me! At least, now that I provide the opportunity for drinks, I don't have to feel guilty about sipping hot coffee in front of them.

The long-handled caddy with the two plastic boxes contains my display books, supplies, and workbooks. The black and white boxes carry things to sketch ~ in this case, weathered sticks and seashells. I try to provide a good selection so students can sketch something that really pleases them. It usually requires two trips to the car to carry everything.

The Drinks Caddy remains the same from class to class, but for other classes, different things end up in the plastic boxes and I bring different things to sketch. I'm trying to compartmentalize all the classes so that I can just pick up a set of containers filled with everything I need for the class at hand.

On January 10 I had a REALLY small class. I need to figure out just why that is. I think I discussed this in a previous blog ~ maybe I'm just offering so many classes that I'm competing with myself in this area's small population, especially during this economic slump. Well, no matter, I love teaching so I took the class on anyway with just three students, Valerie, Randy, and Jacob, who is ten and homeschooled.

I mention the homeschool part because I don't think I would have accepted someone so young except for that. Homeschooled kids tend to be better behaved and interact better with adults than their public school counterparts. And they tend to have longer attention spans. I KNOW that is a generalization, and there are exceptions, but it fits my experiences so I'm happy to go with it. In Jacob's case, it was well founded. My lower limit is officially twelve.

Jacob turned out to have a great sense of humor, and we all enjoyed working alongside him. He got his first experience with tortillons (blending stumps used for shading pencil) during the first day's class, and was so intrigued that he went home and created a number of large ones out of different materials so he could experiment with what works best. You can see his assortment on the table in front of him here.

In case you are a bit puzzled at Jacob's headgear, that is his invention: an Airbag for Pedestrians created from a grocery bag, which he demonstrated during a break. Never a dull moment!

Day 1
As usual, the students got right to work ~ here's Valerie's sea shell and Randy working on a leaf. Our first critique illuminated what worked successfully and what could be done to improve the drawings. Critiques make useful breaks, giving students a chance to stretch and refresh at the "drinks bar."
Randy turned out a particularly nice shell, using many of the techniques we had just learned about shading and reflected light.

Our final project for the day was to draw a wild turkey feather, and the students turned out some nice drawings. Here's Jacob at work on his.


Day 2

We turned to landscape basics to give the students the confidence they need to go outside on their own landscape sketching trips.

They practiced contour drawing in the workbook, working from a redrock photo, to give them a handle on how to tackle an outdoors scene, which can intimidate even seasoned landscape artists. Then they drew common landscape items -- dead sticks, shrubbery, foliage, and tree forms.

With such a small class, I didn't want to hang over their shoulders, so while they worked on their landscapes I sketched them at work, using a modified contour drawing technique in ballpoint pen.

Valerie took this picture of me sketching, and here's what they looked like from my viewpoint, hard at work. I admit to crowding them elbow to elbow for the picture. In actuality, they had a bit more space for working.

They were all working on their final landscapes when I drew this.


Here Valerie is at hard work on her landscape, and below are the landscapes they all produced. Valerie did the redrocks, Jacob produced the waterfall, and Randy drew the rocky canyon. As you can see, they came a very long way for beginners, and I am very proud of them all.

Next weekend is my Nature Illustration Techniques class, but so far I only have three sign-ups for that class, too. But even if the numbers don't reach five for this one, I think I will hold it anyway, even at that low enrollment, since I want to run the new material in the reworked curriculum past some students.

Reworking two classes at once got confusing even to me, and last time I blogged I was thinking my cattail session was for basic students, but it's actually for the intermediates and I am eager to try it out. I think they'll love it. Cattails are WAY cool to sketch.

In the meantime, I'm now working on the Watercolor Pencil Painting class revisions. It is shaping up nicely, and I've created some new materials for the workbooks. This page from one of my Costa Rica journals is in the workbooks, to serve as inspiration for those trying out the watercolor pencils. It's one of my favorite journal pages.

I'm hoping to get a good signup for the February 7-8 class ~ several have signed up already, so perhaps it will grow a bit larger.

Today was the inauguration, and I watched it with a great deal of interest. What a marvelous panoply (had to look up the spelling on that one!)! I was positively entranced.

Enough! Back to work on the watercolor pencil class workbook. I have to get the .pdf to my brother's printing company in time for him to print the workbooks up and FedEx them to me before the class begins, and I haven't finished the second day's workbook yet!

I'd love some feedback if you have a minute. Are these entries getting too repetitive and boring? I love to showcase my students' work, but if there is something more I can write about that you want to know about, let me know.

How about something on dealing with students with Altzheimers?

Cheers,
Irene

Saturday, December 27, 2008

December Workings ~ and other eclectic news


As I had hoped
, I've been successful in working to make my new January classes full of good surprises. I thought I'd just post the workbook covers ~ the first one, "Nature Sketching Details" is the same, but for the last half of the class, "Nature Illustration Techniques" I've got a new workbook and cover, shown at right.

The Nature Sketching Basics class is pretty much tweaked now, and I've added some fun projects, of which drawing cattails is one. I thought you might like to see the covers for those workbooks ~ so here they are.

Preparing the cattails was great fun ~ I was a bit late in realizing I'd better collect them before they explode (that's a naturalist's term for what happens when they go to seed ~ you don't want it to happen unexpectedly in your living room!!!). So I got out my nursery pruners and brought home a dozen-plus from a roadside marsh to prepare for the January Basic drawing class. December is WAY late for collecting cattails, and overnight they started to show signs that they might pop, so I went online to look for preserving directions. After trying out a couple, I wrote out my own recipe. Here's what you do:

How to keep cattails from turning into balls of fluff:
1. Thoroughly mix one part Elmer’s glue to nine parts water in a shallow dish (a poly veggie or meat tray works). Slowly turn each cattail in the mix for 5-10 seconds. If part of it doesn’t moisten, dip a finger in the mix and pat some onto the dry area. Stand the cattails upright where they can’t touch each other until dry (see below). Drying can take up to 10 hours. OR.................

2. If you’re in a big hurry, cheap hairspray will work (the cheapest spray has the most lacquer). To waste little spray and to be as environmentally responsible as possible, stand the cattails up in a bucket of sand to keep them separate and spray all of them at once. They’ll take about an hour to dry.


I've put this recipe in the workbook in case my students want to preseve their own later. I also added to this class a section called "Diagnostics for the artist ~ a checklist," kind of a jumpstart on figuring out how to proceed when you get stuck on a project. I think my students will find this useful in their ongoing development as artists.

I still am working on the "Nature Sketching with Color" workshop, but I quit for awhile before Christmas to do Christmassy things. I expect to get it nicely finished in time for the class in February.

In the meantime, I wanted to share some nice (and interesting to me, at least) things from my life. First of all, the final veggies from my now put-to-bed garden: this little basketful was the tag end of everything, plucked on Thanksgiving Day and eaten with great and proper thanksgiving. Imagine fresh peas from the garden on TG Day! The peas were second generation. I'd missed picking a couple of pods, and when I discovered them in the greenery in August they were hard and dry. So I popped them open, shelled out the peas, and poked them into the soil at the base of the producing peas. Lo! They sprouted and grew, and I got numerous wonderful crispy green salads from them.

This little clump of tomatoes is still ripening in my kitchen. They were from a volunteer Roma tomato plant from last year's garden on the deck. It sprouted midsummer, so I just watered it and let it grow, but it got off to such a late start that by the time of the first frost its clumps of tomatoes were still green. I snipped off this little clump and hung them up with my garlic over the sink, where they have turned from deep green to bright red and look like something out of an Old Master's painting. They're almost ready to eat now, and I'm ready to eat them!

If you've paid attention to the national weather, you'll know that western Oregon is having some wet, cold weather. I've been snowbound for a couple of weeks, although Daniel has come up to visit a couple of times in his 4WD, and taken me out for dinner, Christmas shopping and Christmas Dinner down at his mom's.

So I've been doing house projects. Here's a cheap fix for an area of my house that never got properly finished when I built the house (never move into a house until it is completely built, or it may never get done. I'm not even SAYING how long this little task remained unfinished!). On the left is what it looked like before, with a high-up area needing some wall covering to hide 2x4s. On the right is the "after" photo. The covering is reed matting which is cheap, easy to cut (tin-snips), apply (staples), and not too heavy for this woman to lift and hold while standing near the top of the ladder and fastening it to the 2x4s. I mean, it's bad enough to stand on the next-to-the-top rung vacuuming (that's the vacuum cleaner on the ladder in the photo), but lifting heavy stuff? Uh-uh! I think that looks kind of nice, don't you? It's a bit eclectic, but I like it.

Now this next thing, you might want to skip over if scorpions give you the willies....DEFINITELY don't click to enlarge the photos! the scorpion was in the matting when I unrolled it. Very unexpected. I don't see one of these from one year to the next. It was about 2" long, but it was also chilled and I wasn't even sure it was alive until it lethargically twitched a leg when I slid a leaf edge under it. I photographed it on an oak leaf, then tucked it under debris in a log out in the woods where it might safely winter. These guys are marvelous little creatures, and I'd like to draw this one. I didn't have time to sketch it when I found it. I was intent upon putting up the reed matting and it was almost dark. I may be able to get a good sketch from the photos.

Moving right along, I wanted to share a really pretty picture of homemade Christmas tree ornaments. Wouldn't this make a nice jigsaw puzzle? I made most of these tree ornaments many years ago (collected some, but made most) but since I don't put up a tree anymore I photographed them then packed them up and sent them to my grandniece Amy, who has a little child, Ella, and has always admired and coveted them. She sent me a picture of the ornaments all dancing on a little tree at her house, so I know they are in a good home now.

****************************************

And now, I have a confession to make. I have been sending out occasional workshop newsletters, but I'm going to stop. I realized that I was procrastinating lavishly at the very thought of writing the newsletter, and if that's the way I'm going to behave, well, I just don't get to send them out anymore. So there.

And boy, what a relief THAT is! So if you were wondering when the heck I was going to send out the next newsletter, now you know. I may send out one really short one to tell people the jig's up. But not receiving my newsletter is no big deal if you bookmark my workshop website and come by now and then to check out the itinerary. I have it up to date as of yesterday, with some workshops planned clear through September, and more to come as the season progresses.

I'm planning to broaden my scope to a larger area, giving workshops out of the Jefferson Nature Center near Medford (OR), in addition to the North Mountain Park Nature Center, in order to tap that larger artist pool. I'm really looking forward to that.

In the meantime, if you have any ideas for workshops you'd like me to give, get in touch and let me know. Even it you just have suggestions for subjects, I'd like to hear about it.

Here's wishing you a Happy New Year for 2009. I hope your 2008 was as fulfilling as mine.

Cheers,
Irene

Sunday, November 30, 2008

Nature Sketching Details Workshop ~ 11-22&23-08

There's never enough time! I've been struggling with this problem with every workshop ~ I have so much I want to teach/share, and so little time to do it in.

During all this last autumn's workshops I tinkered lavishly to find the right balance of time vs. content, guaranteed success vs. challenge, plus adjusting other details ~ all while giving the students results they expected and hoped for. The student evaluations at the end of the classes really helped me figure this out (and the students who won the evaluation raffles appreciated the autographed book prizes ;^)

This fall, I had split the Nature Sketching classes into Beginning (Nature Sketching Basics) and Intermediate (Nature Sketching Details) workshops, which gave the students time to concentrate and complete more projects. Starting in January, I will have further split off the watercolor pencil painting section into its own two-day class, in order to allow the students more time to hone their skills and experiment with the medium.

I will also split the Nature Journaling workshop into two 1-day workshops so that people interested only in nature writing OR in nature journaling could come to whichever class appeals to them. The workshops will be held back-to-back on a weekend, so it's easy enough to take them together, as before.

Obviously, this December I am going to be busy working out more exercises for some of the classes, because when I split them up there was necessarily some repetition of the exercises to bring each class up to speed. The students would prefer a fresh exercise instead of repeating a previous one. In terms of learning, it's probably more useful to repeat an excercise several times, but when you pay for a workshop you expect to get all-new revelations, so I'll work to make sure there are no repeats. I really DO listen to my students!

So that's the update on the behind-the-scenes workshop planning.
Here's what my most recent batch of eager students went through.

DAY 1
This was my intermediate nature drawing workshop, so I was quite pleased to see some returning Basic students appear Saturday morning, along with new students. And I had all ages, from a very mature twelve to somewhere in the late 60s or 70s. Great people.

The format of this class was to spend the first day on pencil rendering, including ways to get the drawing accurate, shading for three-dimensional effect, and learning special techniques for special situations (realistic eyes, hair direction, and rendering symmetry in such things as seashells and leaves, etc.). Here's the class, warming up with the draw-your-hand exercise before launching into the details.

Notice the way the classroom is set up in an L shape ~ I like to coach from in front of the student if possible. This keeps me from jostling the student (and the adjacent student) because I can come in from the top of their drawing instead of beside, although sometimes I need to go around behind to see the subject from the student's perspective.

When I have more students, I add another table to make a U, which still gives me the inner work area. This is especially nice because no one has their back to me, and students can see the demos better.

For this class I now tried out a new project, and the results were thrilling both to the students and to me. Students who had time, took their project home to perfect, but most of these were finished in the class.


Be sure to click on these to look at them close-up, because we did some really tricky stuff with them.

DAY 2
On
the second day, after admiring and critiquing the mushrooms they'd brought back to class, we concentrated on color, trying pencil, ballpoint, and micron pen drawings combined with various watercolor pencil color wheel combinations to get brown. Then they drew bones and experimented with various ways to use color as shading on the (relatively) white bones.

I encouraged
them to use unconventional colors for effect, since anything white bounces back colors that surround it, and their results were fascinating. Here's a pony tooth rendered in green and blue, and a beaver jawbone rendered in ochre and purple, and they both came out excellent and very natural-looking (as did the bones by other students).

The next project was my standby orchid ~ this is a useful model for teaching brush techniques for edges, because it emphasizes how to get precise clean edges and also how to get soft, blurred edges which blend off to nothing. It always amazes (and pleases) me how every orchid ends up different, even though each student hears and responds to exactly the same instructions.

Now
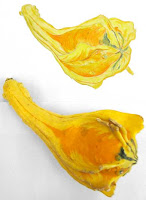
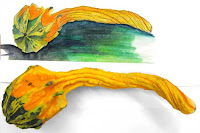
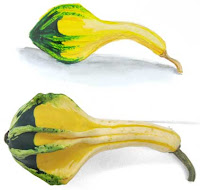
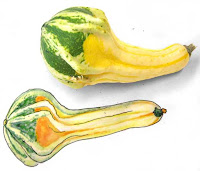
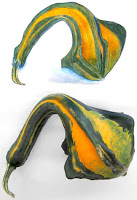
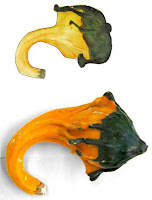
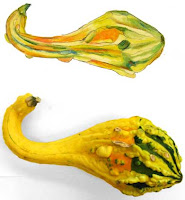
they had MOSTof the skills they needed to tackle the day's final project, to draw and paint some gourds I'd found in the local farmer's market. There was one remaining technique I showed them about removing color from the pencil tip with the brush to apply to their picture. You can get a nice, intense color this way, and apply it more precisely then you could with the pencil.

I have to say here that my students are really gracious about my taking pictures. I urge them to just keep working as I come by to snap photos (I do turn the flash off for the least intrusion). For the two photos showing how to remove color from the pencil,
though, Randye slowed down a little so I could get the pictures.

One technique we used for these gourds was an under-wash to help blend the color values. Varying shades of yellow seemed best for most of these gourds. You can see the wash at right. The students had a choice of doing the original drawing with pencil or ink. I was pleased when some of them chose ballpoint, because we had tried it out earlier in the day.

While drawing in ink would seem impossible for a beginning or even intermediate student, they discovered (as I had hoped)(and MOST counter-intuitively) that drawing in ink is sometimes easier and more freeing than drawing in pencil. Some students not only drew the original gourd in ink, but then went back after coloring it and put in details with a pen, with excellent results ~ particularly for a first-time effort. Here are their gourd paintings. Be sure to click on them to see them close up.


As I was saying in the beginning of this post, there never seems to be enough time to finish. These gourds, first time watercolor pencil renderings for (I think) all of these students, were completed (or not completed!) in about an hour and a half. Amazing, huh? While the students learned an immense amount, I think with less pressure and more time they would have been able to produce even more satisfying paintings, as well as learning a few more subtleties. I think the two-day watercolor pencil workshops from January onward will be a very pleasing improvement over this one-day experience with color.

Here's a grab-bag of other entries...

Related Posts with Thumbnails