To join me on a virtual sketching trip, download a travel sketch-journal here.
I add tutorials to them so you can learn the techniques and details you see in the sketchbooks.

My former workshop students asked me to upload my workshop workbooks to make them available to everyone. So you can also download a workbook and give yourself a workshop! Enjoy!


Showing posts with label watercolor pencil rendering. Show all posts

Saturday, June 18, 2011

Sketch/Journal in Progress

I've been up to my nostrils in preparing my latest sketch journal tutorial, but I wanted to surface for a minute to say hi, that I'm really still here, not disappeared down Alice's rabbit hole.

The weather has finally changed from long, cold, rainy, snitty spring (record cold temperatures and record rainfall, BOTH) to a still fairly cool but sunny summer. The vetch is out on the hillsides in glorious profusion (see above right). The bigleaf maples (at left) have just finished flowering (did you know some people pick these flower clumps and fry them in batter like fritters? I haven't tried that yet...)

Temperatures haven't even hit 90 yet, but that makes it great when I go down to Plant Oregon, Dan's native plant nursery, to weed every afternoon at 4 or 5pm. While the sun is still hot and the temperature varies between 60 and 80+, I weed in the shady spots, or alternate with sunny rows to warm up again. Then when the sun goes behind the western row of trees along the creek, I carry my weeding stool over to the once-sunny rows to weed. Birds are singing, bees are buzzing, it's nice.

But in the mornings I am at my computer, sorting out which photos (of some 730 of them) to use in the tutorial, which means I'm reliving my vacation in Kauai again, day by day, beach-crawl by beach-crawl, satisfying day by day. I'll experience the whole thing again when I put it together and write the tutorial. And then every time I pull the original journal down off the shelf to read it. How could you top that?!

But ya sure wouldn't want to do a tutorial for a BAD trip! Ouch!

Anyway, I thought you might be interested in how it's coming along, although I haven't yet started writing the tutorials.


For the Sea Biscuit tutorial page, I wanted to set the scene with what the beach morning glory vine looked like as I sat sketching. Here are the two photos I'll use for that, plus one I found later in bloom. It's a gorgeous, lush plant, growing on a hot sandy beach you wouldn't think could support such luxuriant growth.


The "sea biscuit" is so exquisite I spent about two hours drawing it. I was so entranced and sat so long my bum got numb. If you look at it close up, you'll see lots of little raised white dots. There was probably a spine attached to each one. I wonder if this is the remains of the spiny black sea urchin I saw earlier washed up onshore.....I don't have a good guide for sea urchin tests (a test is this calcareous skeleton left behind when the animal goes to meet its maker).

Then, since I journaled about the yummy mango that washed up on shore and ended up in my tummy (most of it) and Daniel's (the ridiculously small amount I could bear to be a generous person and share...), I'll include a photo of that, too. The crabs had eaten part of it, the pigs. Best mango I ever tasted!

This will all be accompanied with a discussion of how I approached the page, dealt with setbacks, worked out the symmetry of the test, and did the decorative Hawaiian style border on the right side of the page.

Another page, with brilliant red African Tulip Tree blossoms, posed entirely different challenges.


The original view from the window was too far away for drawing with any clarity, so I worked partially from a photo. Working from the screen of a digital camera allows you to magnify detail a lot, but even so, the details of that flower cluster were ambiguous, so I had to examine a fallen bloom from a different tree to see how the flowers were constructed.

The tutorial will discuss the possible pitfalls of working from photos, and also how to get strong, vibrant color with watercolor pencils ~ which many artists have avoided because they thought it couldn't be accomplished. It can be, as you can see.

So I'm working busily away in my studio looking out into the oh-so-green woods. That rainy spring may have been depressing, but it engendered some of the most riotous greens I've ever seen. The very air is tinted green, even in my studio!

I'm almost finished sorting through the photos in Photoshop, correcting the lighting, making dull, cloudy day pictures sparkle (yes, we had several cloudy days, and those pictures look a LOT better if I brighten them up a bit), and rescuing underexposed photos (hey, check out the before-and-after photo here ~ there's a lot of information you can rescue if you know how to find it, although some of it, color mostly, is lost). It's fun, and I love it.

I'll be done preparing in a couple of days, then I'll start assembling everything into the book in InDesign, the Adobe desktop publishing program I use for all my books, and you'll be able to download it in a month or so, I hope.

If you have put your name in the little bitty box near the end of the right column above, you'll be notified when I blog about uploading it so you can get your copy.

Until then, Aloha! And have a good summer!

Wednesday, May 6, 2009

Watercolor Pencil/Computer Interpretive Sign

Sometimes I do illustration jobs, and at the moment I have two in the hopper, both interpretive signage for nature trails. I just finished a really interesting one which took a great deal of time ~ a section of Jeffrey pine trunk with three lichens on it. It was the third in a series, the first two being a distant view of the entire tree and a composite of bark, branch/needles, and cone.

In case you've never met a Jeffrey, it's a western pine similar to the prickly ponderosa pine, but the cones generally won't make holes in you if you play catch with them. DON'T try catching a tossed ponderosa cone!

The trunk of both is very similar: reddish, with a bark composed of layered jigsaw-shaped pieces. The bark has a sweet scent. Some say it smells like pineapple, others say it's a vanilla odor. I smelled one once and couldn't quite place the scent ~ but it was very pleasant.

At any rate, it took ages to work around all the jigsaw pieces then color them appropriately. I had a good photograph provided by the people who wanted the sign, and in order to meet the deadline I followed the shapes of the bark pieces closely (after some judicious artistic rearrangement) using my Wacom tablet and a stylus. To envision and create the shapes from scratch would have taken forever. Click on an image to see a larger version.

The first image (above) is the first run at the flaky bark, the original photo I was working from, the selection of watercolor pencils I chose to color it, and my waterbrush with the water in the barrel. My drawing is on the left and that's the photo on the right.

When I had the outline finished, I printed out the b/w image to paint. I needed to work large since it's a large sign, so I separated the original illustration into two sections and printed them on two sheets of heavy, slightly toothed paper that I knew would take the moisture required by the watercolor pencils.

I was working out on the deck to enjoy the warm spring sunshine, so I taped a plastic dish to my masonite drawing board to hold the pencils so they wouldn't slide when I tilted the board on my lap. In the second image, with the photo on the left, I've started applying the color to the b/w image on the right. It looks a bit faded in the bright sunshine. I'm leaving unpainted the areas where the lichens will go.

The third image (above) shows the drawing taking shape and color. The photo is still on the left here, and while I'm using the reference fairly closely, I am taking some artistic license with the color and details.

In the next image you can see all the parts and pieces. The two-part illustration is on the left. The lichen illustrations will be layered into place after I blend the two parts together in Photoshop.

There is a slight overlap of the two bark sections, but since they're hand-painted, the two aren't exactly the same. The solution to join them seamlessly is to layer them into perfect place then use the eraser on 1% to remove the top layer until they blend. It works amazingly well, the joining being invisible when finished.

The photo is on the right in this composite. Down at lower left is a printout of my original drawing, showing a red outline where I planned to put the lichens ~ I didn't want to waste time and energy drawing or painting the area behind them.

At this point, I scanned the painted bark illustrations back into Photoshop to blend the two pieces together, add the lichens, and tweak the shading.

And the final image is a detail of the finished illustration. I darkened the fissures between the bark slabs to visually deepen them, using the "burn" tool in Photoshop CS2. I also used the burn tool to darken the right side, to make the bark appear to recede as it goes around the cylinder of the trunk. I also darkened a shadow below each lichen.

I'm pretty happy with this combination of design, handwork, watercolor pencil coloring, and computer blending. It took a long time, but the results were well worthwhile.

The more practice I get with the watercolor pencils and waterbrush, the more I like them. It also gives me a better handle on presenting watercolor pencil painting to my workshop students.

******

BTW, I taught my new Wildlife Sketching class last weekend. It was quite a ride. I'll try to get at that before this next weekend because I have another journaling workshop on the 9th and I'm trying to keep my ducks in a row! Wish me luck!

Sunday, November 30, 2008

Nature Sketching Details Workshop ~ 11-22&23-08

There's never enough time! I've been struggling with this problem with every workshop ~ I have so much I want to teach/share, and so little time to do it in.

During all this last autumn's workshops I tinkered lavishly to find the right balance of time vs. content, guaranteed success vs. challenge, plus adjusting other details ~ all while giving the students results they expected and hoped for. The student evaluations at the end of the classes really helped me figure this out (and the students who won the evaluation raffles appreciated the autographed book prizes ;^)

This fall, I had split the Nature Sketching classes into Beginning (Nature Sketching Basics) and Intermediate (Nature Sketching Details) workshops, which gave the students time to concentrate and complete more projects. Starting in January, I will have further split off the watercolor pencil painting section into its own two-day class, in order to allow the students more time to hone their skills and experiment with the medium.

I will also split the Nature Journaling workshop into two 1-day workshops so that people interested only in nature writing OR in nature journaling could come to whichever class appeals to them. The workshops will be held back-to-back on a weekend, so it's easy enough to take them together, as before.

Obviously, this December I am going to be busy working out more exercises for some of the classes, because when I split them up there was necessarily some repetition of the exercises to bring each class up to speed. The students would prefer a fresh exercise instead of repeating a previous one. In terms of learning, it's probably more useful to repeat an excercise several times, but when you pay for a workshop you expect to get all-new revelations, so I'll work to make sure there are no repeats. I really DO listen to my students!

So that's the update on the behind-the-scenes workshop planning.
Here's what my most recent batch of eager students went through.

DAY 1
This was my intermediate nature drawing workshop, so I was quite pleased to see some returning Basic students appear Saturday morning, along with new students. And I had all ages, from a very mature twelve to somewhere in the late 60s or 70s. Great people.

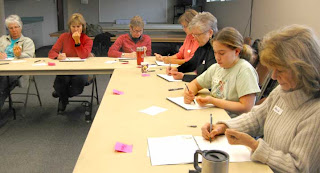
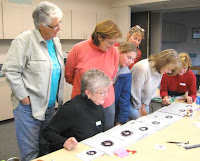
The format of this class was to spend the first day on pencil rendering, including ways to get the drawing accurate, shading for three-dimensional effect, and learning special techniques for special situations (realistic eyes, hair direction, and rendering symmetry in such things as seashells and leaves, etc.). Here's the class, warming up with the draw-your-hand exercise before launching into the details.

Notice the way the classroom is set up in an L shape ~ I like to coach from in front of the student if possible. This keeps me from jostling the student (and the adjacent student) because I can come in from the top of their drawing instead of beside, although sometimes I need to go around behind to see the subject from the student's perspective.

When I have more students, I add another table to make a U, which still gives me the inner work area. This is especially nice because no one has their back to me, and students can see the demos better.

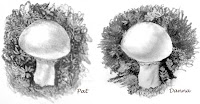
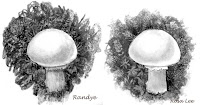
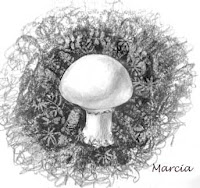
For this class I now tried out a new project, and the results were thrilling both to the students and to me. Students who had time, took their project home to perfect, but most of these were finished in the class.


Be sure to click on these to look at them close-up, because we did some really tricky stuff with them.

DAY 2
On
the second day, after admiring and critiquing the mushrooms they'd brought back to class, we concentrated on color, trying pencil, ballpoint, and micron pen drawings combined with various watercolor pencil color wheel combinations to get brown. Then they drew bones and experimented with various ways to use color as shading on the (relatively) white bones.

I encouraged
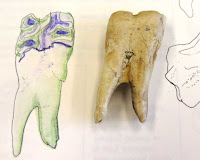
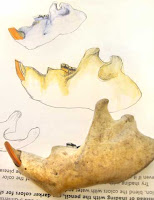
them to use unconventional colors for effect, since anything white bounces back colors that surround it, and their results were fascinating. Here's a pony tooth rendered in green and blue, and a beaver jawbone rendered in ochre and purple, and they both came out excellent and very natural-looking (as did the bones by other students).

The next project was my standby orchid ~ this is a useful model for teaching brush techniques for edges, because it emphasizes how to get precise clean edges and also how to get soft, blurred edges which blend off to nothing. It always amazes (and pleases) me how every orchid ends up different, even though each student hears and responds to exactly the same instructions.

Now
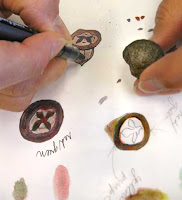
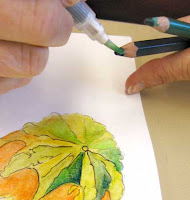
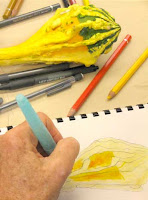
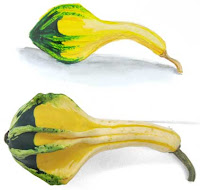
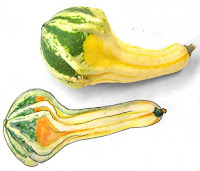
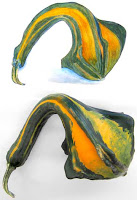
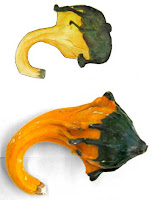
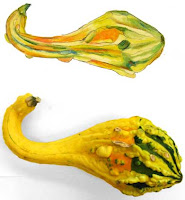
they had MOSTof the skills they needed to tackle the day's final project, to draw and paint some gourds I'd found in the local farmer's market. There was one remaining technique I showed them about removing color from the pencil tip with the brush to apply to their picture. You can get a nice, intense color this way, and apply it more precisely then you could with the pencil.

I have to say here that my students are really gracious about my taking pictures. I urge them to just keep working as I come by to snap photos (I do turn the flash off for the least intrusion). For the two photos showing how to remove color from the pencil,
though, Randye slowed down a little so I could get the pictures.

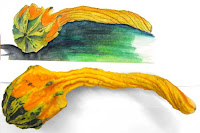
One technique we used for these gourds was an under-wash to help blend the color values. Varying shades of yellow seemed best for most of these gourds. You can see the wash at right. The students had a choice of doing the original drawing with pencil or ink. I was pleased when some of them chose ballpoint, because we had tried it out earlier in the day.

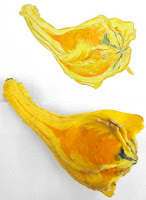
While drawing in ink would seem impossible for a beginning or even intermediate student, they discovered (as I had hoped)(and MOST counter-intuitively) that drawing in ink is sometimes easier and more freeing than drawing in pencil. Some students not only drew the original gourd in ink, but then went back after coloring it and put in details with a pen, with excellent results ~ particularly for a first-time effort. Here are their gourd paintings. Be sure to click on them to see them close up.


As I was saying in the beginning of this post, there never seems to be enough time to finish. These gourds, first time watercolor pencil renderings for (I think) all of these students, were completed (or not completed!) in about an hour and a half. Amazing, huh? While the students learned an immense amount, I think with less pressure and more time they would have been able to produce even more satisfying paintings, as well as learning a few more subtleties. I think the two-day watercolor pencil workshops from January onward will be a very pleasing improvement over this one-day experience with color.

Sunday, July 27, 2008

Costa Rica Sketch Journal ~ July 9, 2008


The Day of the Sloth. This was a "slothful" day. It started off with a hike with Dan'l down the trail used by Gerardo to take rappelers to the waterfalls. Most people don't hike this trail because it's pretty steep coming back up ~ the rappelers only go down it. But I'd gotten a taste of it in February on my last visit, and I wanted to see where it went.


Watching carefully for snakes (just as one would watch for rattlesnakes in the desert), we moseyed down the switchbacks to the lovely stream at the bottom of the ravine, which is on the south side of the ridge our cabina is built on. At the bottom I sat down to sketch a vine winding its way up a tree while Dan explored along the stream.


Dim light filtered down greenly, and I was glad I had my little sitter pad because the ground was spongey wet. I had a pretty nice likeness of the vine by the time Dan splashed back up the stream. He had hoped to return with me back up the path and trot down to the beach for a nice soak in the tidepools, but I persuaded him to return without me because I had spied a wonderful buttressed tree I wanted to draw. Sitting on a log in the middle of the stream (on my sitter pad, for sure!) I spent the next forty-five minutes drawing the sinewy, sinuous, sensual roots.


Then, at a very leisurely pace, I wandered up the steep trail. I hardly registered how steep it was because I was going so slowly, photographing mushrooms, leaves, seeds, and putting my hand down right next to ..... a beautiful sloth skull! My jaw dropped. What's the likelihood of finding a sloth skull right beside the trail, at waist level, perfectly preserved with all its teeth, completely bare as though someone had scientifically prepared it for display?! It was gorgeous! (Confession: I have been a skull collector since I was a little girl ~ by high school I had more than 60 skulls in my bedroom-museum.)

Carefully packing a plastic bag around it (I keep plastic tote bags in the bottom of my carrybag so that if I set the carrybag down on a wet surface only the plastic bags will get wet, not my sketchbook edge), I tucked it into my bag to take back to the lodge and identify, and continued up the trail past a huge monkey ladder vine, and around the next switchback (in case you don't hike in steep places, a switchback is where a climbing trail "switches back" on itself to continue to another level). There, directly above where I'd found the skull, on the downhill side of the trail, was the rest of the sloth skeleton, nearly invisible as it consisted of tan bones scattered among tan leaves and sticks. The skull being smooth and cylindrical, had rolled down to the next level spot. Squatting down, I poked at them a bit to see what I could see and discovered a claw, nearly three inches long. I tucked that into my bag, too.

I sat quietly on a log awhile, further up the trail, to watch a mixed flock of birds chatter through all around me, totally ignoring me. They were foraging, and I watched a black-hooded antshrike (identified later) feed SOME kind of huge spidery thing to its companion. I looked around me at the log, at the leaf litter, at the sprawling vines and foliage, wondering what I was missing from my human viewpoint. Lots, apparently!


That afternoon, relaxing with Dan'l on our terrazo, I went up to check out the swimming pool for a possible dip and discovered .....well, read about it on the journal page here. It was very exciting! And here's a photo I took through the lens of the spotting scope Gerardo set up for us to look through. I sketched the journal page from a photo that he took, closer to the pair, with my camera.


Like I said, it was a slothful day.


******************************


Yesterday I said I'd try to include a scan of the painting I'm doing for the cover of The Southern Swamp Explorer. I've included it here.

By way of explanation: nothing is finished yet. While I have added color to many areas, I will probably go back and add/change/darken/lighten colors to get the effects I want.

In the alligator area, I've done quite a bit on the mama gator, and I'm now working on the vegetation mass which has sheltered the eggs. The vegetation is old, rotting, and will be darker, but at the moment I am coloring it. On the right I have applied the watercolor pencil, while on the left some of it has been watered already. It's not dark enough, but this underlayment of color will make the darkening look realistic.

Thursday, July 24, 2008

Costa Rica Sketch Journal ~ July 5&6, 2008

I've been trying to get my journal scanned in, but yesterday I ran out of time and got ahead of myself with the photos. So step back a day into my sketch journal.

JULY 5. I had some time in San José to do a bit of sketching and watercolor pencil painting as Dan puzzled out the news from a San José newspaper (in Spanish, of course), which kept him busy for quite some time. At the bar I did a modified contour drawing (in which you don't lift the pen point while drawing) of my margarita. Sketching and journaling in the bar were easy because the light was soft but decent and CLASSICAL music played in the background! I complimented the hotelier on the choice of music. I would recommend this hotel without hesitation.

I worked on my page with the "black cow" and the fig leaf that night in bed, but then realized I would need to plan page designs better ~ these last two pages have almost identical format. I do love how mess-free the watercolor pencils and waterbrush make the process.

But all was not mess-free. When I pulled out my glue to stick the fig leaf on, I found that it had expanded during the plane flight and the ziplock bag containing it (and my toothbrush, sunscreen, etc.) was muy sticky inside. I was very glad to discover that the glue was water soluble, but I was in and out of bed for awhile, cleaning up the gluey mess.

The Nature Air ticket was so pretty I wanted to make the back of it visible, too (plus save room on journal pages) so I accordian pleated it and just glued in one end of it. The graphic here shows it unfolded ~ there were a lot of Photoshop steps required between scanning it in and making the ticket look 3-dimensional. Just having fun. [There -- that catches me up on the journal pages.]

JULY 6. After arriving at El Remanso from Puerto Jimenez, we got settled in our cabina and had breakfast with Adri and Danni, who run the lodge. Then we headed down to the beach ~ Dan'l's favorite place. He simmered in the wonderful tidepools for ages, but I got cooked before he did so I beachcombed and enjoyed the soft tropical air while collecting treasures from the sand.

That afternoon I painted the lavender vine flower while Dan read in the hammock. The more I use these watercolor pencils, the better I like them. I sincerely doubt you could tell these sketches were colored with watercolor pencils rather than straight watercolors.

Sitting on the terraza (Spanish for terrace) was wonderfully peaceful yet exciting at the same time. There always seemed to be something happening right before our eyes. Every afternoon at about 3:30, for instance, a coati bounded up out of the ravine and across our lawn, barely six feet from our bare toes. A heliconia flower daily lowered a petal, revealing flower parts feasted on by little black furry bees. Rains came some afternoons, and we reveled in the lightning and thunder as the storm rushed up the ravine, huge raindrops tapping on wide, rubbery heliconia leaves, the forest canopy, then finally on our clay roof tiles ~ to then cascade off the eaves in silvery waterfalls. It was mesmerizing. This photo shows the terraza view with a storm coming up from the beach.

That first evening on our terraza, I journaled the wonderful night sounds I was hearing with words and color. Those are what I miss most since my return ~ the dawn and dusk choruses.

More tomorrow.

Here's a grab-bag of other entries...

Related Posts with Thumbnails