As I had hoped, I've been successful in working
 to make my new January classes full
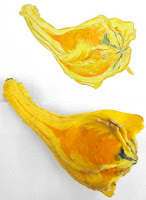
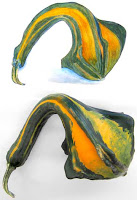
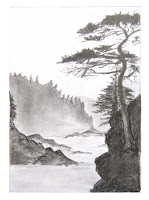
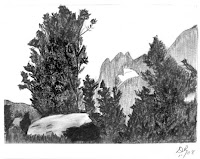
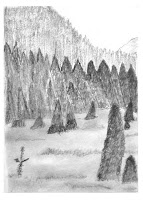
  of good surprises. I thought I'd just post the workbook covers ~ the first one, "Nature Sketching Details" is the same, but for the last half of the class, "Nature Illustration Techniques" I've got a new workbook and cover, shown at right.
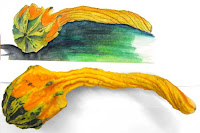
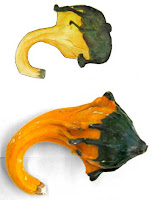
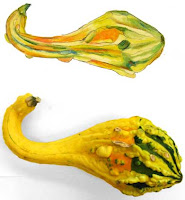
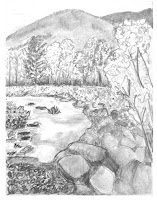
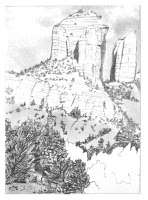
The Nature Sketching Basics class is pretty much tweaked now, and I've added some fun projects, of which drawing cattails is one. I thought you might like to see the covers for those workbooks ~ so
 here they are.
Preparing the cattails was great fun ~ I was a bit late in realizing
 I'd better collect them before they explode (that's a naturalist's term for what happens when they go to seed ~ you don't want it to happen unexpectedly in your living room!!!). So I got out my nursery pruners and brought home a dozen-plus from a roadside marsh to prepare for the January Basic drawing class. December is WAY late for collecting cattails, and overnight they started to show signs that they might pop, so I went online to look for preserving directions. After trying out a couple, I wrote out my own recipe. Here's what you do:
How to keep cattails from turning into balls of fluff:

1. Thoroughly mix one part Elmer’s glue to nine parts water in a shallow dish (a poly veggie or meat tray works). Slowly turn each cattail in the mix for 5-10 seconds. If part of it doesn’t moisten, dip a finger in the mix and pat some onto the dry area. Stand the cattails upright where they can’t touch each other until dry (see below). Drying can take up to 10 hours. OR.................
2. If you’re in a big hurry, cheap hairspray will work (the cheapest spray has the most lacquer). To waste little spray and to be as environmentally responsible as possible, stand the cattails up in a bucket of sand to keep them separate and spray all of them at once. They’ll take about an hour to dry.
I've put this recipe in the workbook in case my students want to preseve their own later. I also added to this class a section called "Diagnostics for the artist ~ a checklist," kind of a jumpstart on figuring out how to proceed when you get stuck on a project. I think my students will find this useful in their ongoing development as artists.
I still am working on the "Nature Sketching with Color" workshop, but I quit for awhile before Christmas to do Christmassy things. I expect to get it nicely finished in time for the class in February.
In the meantime, I wanted to share some
 nice (and interesting to me, at least) things from my life. First of all, the final veggies from my now put-to-bed garden: this little basketful was the tag end of everything, plucked on Thanksgiving Day and eaten with great and proper thanksgiving. Imagine fresh peas from the garden on TG Day! The peas were second generation. I'd missed picking a couple of pods, and when I discovered them in the greenery in August they were hard and dry. So I popped them open, shelled out the peas, and poked them into the soil at the base of the producing peas. Lo!
  They sprouted and grew, and I got numerous wonderful crispy green salads from them.
This little clump of tomatoes is still ripening in my kitchen. They were from a volunteer Roma tomato plant from last year's garden on the deck. It sprouted midsummer, so I just watered it and let it grow, but it got off to such a late start that by the time of the first frost its clumps of tomatoes were still green. I snipped off this little clump and hung them up with my garlic over the sink, where they have turned from deep green to bright red and look like something out of an Old Master's painting. They're almost ready to eat now, and I'm ready to eat them!
If you've paid attention to the national weather, you'll know that western Oregon is having some wet, cold weather. I've been snowbound for a couple of weeks, although Daniel has come up to visit a couple of times in his 4WD, and taken me out for dinner, Christmas shopping and Christmas Dinner down at his mom's.
So I've been doing house projects.
 Here's a cheap fix for an area of my house that never got properly finished when I built the house (never move into a house until it is completely built, or it may never get done. I'm not even
 SAYING how long this little task remained unfinished!). On the left is what it looked like before, with a high-up area needing some wall covering to hide 2x4s. On the right is the "after" photo. The covering is reed matting which is cheap, easy to cut (tin-snips), apply (staples), and not too heavy for this woman to lift and hold while standing near the top of the ladder and fastening it to the 2x4s. I mean, it's bad enough to stand on the next-to-the-top rung vacuuming (that's the vacuum cleaner on the ladder in the photo), but lifting heavy stuff? Uh-uh! I think that looks kind of nice, don't you? It's a bit eclectic, but I like it.
Now this next thing, you might want to skip over if scorpions give you the willies....DEFINITELY don't click to enlarge

 the photos! the scorpion was in the matting when I unrolled it. Very unexpected. I don't see one of these from one year to the next. It was about 2" long, but it was also chilled and I wasn't even sure it was alive until it lethargically twitched a leg when I slid a leaf edge under it. I photographed it on an oak leaf, then tucked it under debris in a log out in the woods where it might safely winter. These guys are marvelous little creatures, and I'd like to draw this one. I didn't have time to sketch it when I found it. I was intent upon putting up the reed matting and it was almost dark. I may be able to get a good sketch from the photos.
Moving right along, I wanted to share a really pretty picture of homemade
 Christmas tree ornaments. Wouldn't this make a nice jigsaw puzzle? I made most of these tree ornaments many years ago (collected some, but made most) but since I don't put up a tree anymore I photographed them then packed them up and sent them to my grandniece Amy, who has a little child, Ella, and has always admired and coveted them. She sent me a picture of the ornaments all dancing on a little tree at her house, so I know they are in a good home now.
****************************************
And now, I have a confession to make. I have been sending out occasional workshop newsletters, but I'm going to stop. I realized that I was procrastinating lavishly at the very thought of writing the newsletter, and if that's the way I'm going to behave, well, I just don't get to send them out anymore. So there.
And boy, what a relief THAT is! So if you were wondering when the heck I was going to send out the next newsletter, now you know. I may send out one really short one to tell people the jig's up. But not receiving my newsletter is no big deal if you bookmark my workshop website and come by now and then to check out the itinerary. I have it up to date as of yesterday, with some workshops planned clear through September, and more to come as the season progresses.
I'm planning to broaden my scope to a larger area, giving workshops out of the Jefferson Nature Center near Medford (OR), in addition to the North Mountain Park Nature Center, in order to tap that larger artist pool. I'm really
 looking forward to that.
In the meantime, if you have any ideas for workshops you'd like me to give, get in touch and let me know. Even it you just have suggestions for subjects, I'd like to hear about it.
Here's wishing you a Happy New Year for 2009. I hope your 2008 was as fulfilling as mine.
Cheers,
Irene


