To join me on a virtual sketching trip, download a travel sketch-journal here.
I add tutorials to them so you can learn the techniques and details you see in the sketchbooks.

My former workshop students asked me to upload my workshop workbooks to make them available to everyone. So you can also download a workbook and give yourself a workshop! Enjoy!


Showing posts with label Lava Butte. Show all posts

Sunday, October 5, 2014

Snowbirding in Belize


Howler Monkey descending
It's about time  to finish the saga I began earlier this year. I started to tell you about it here in May, and I was planning to update it within a week or two with ongoing events, but that was May and this is October.  Oh MY! 


Since it's probably been awhile since you read it.....I'd started to tell you about my decision to Snowbird in Belize, and the incredible chain reaction that set off in my life (okay, NOW go back and read it if you have a minute ;o}

+o+o+o+o+o+o+o+o+o+o+o+o+o+o+o+o+o+

The road past my door-to-be
Upon returning from my Christmas vacation and my visit to Better In Belize, the intentional community I wanted to build in and move to in Belize, I pondered how on earth I was going to pay for the property.  I didn't have enough savings in the bank to do it; I didn't want to mortgage my house and make payments on that for rest of my life; and I finally concluded that the only way to swing it would be to take the plunge and sell my little house in the big woods.
my little house in the big woods

Now, I love my Oregon woods and its creatures, and my little house suited me well. I mean, just check out this year-long sketch/journal I did there in 2012!

But for some years now I had found myself sinking into a sedentary old age, swaddled in long underwear through the long, cold winters grudgingly warmed by a wood stove. 

fetching firewood—blechh
It gets really tiresome to fetch wood and keep the home fires burning, and only yearly trips to the tropics made it bearable.  Why not make the leap? I'd been considering it strongly for YEARS!

So January found me putting my house on the market and showing it for a whole three days before it was snapped up by a sculptor/videographer couple, just the perfect buyers.  

February was an incredible stew of packing, planning, organizing and executing.  I would live in Belize for the coldest six months of the year, but I plan to live here in Oregon for the other six months, so I needed a residence. 

35 years of "stuff" in storage
My first idea was to buy into a tiny community just up the road from my house, but that fell through due to zoning problems.  Still, the idea of a self-contained movable home was born. 

Plant Oregon, where I weed in summers
 March came, and Daniel, at Plant Oregon, the nursery where I weed most afternoons in the summers, offered me the use of his cabin, which he wasn't using, until I could get things straightened out.  I accepted gratefully, because I had to be out of my house by the middle of March, barely six weeks after making my decision to sell and a month after the sale was finalized! 

Sorting, storing, hauling, selling....
Imagine excavating, sorting, pitching, storing, giving away and/or moving 35 years worth of belongings in six weeks! I vacated into Dan's Cabin at the nursery, settling as comfortably as possible into temporary quarters, and weeding to keep my brain from exploding.

In the meantime, I deposited the payment for my house and land, and I was negotiating buying my lot in Belize, discussing house plans with my Belizean builder, and looking at Tiny Homes  to live in here in Oregon. It finally dawned on me that although Tiny Homes are darling, and speak to my Hobbity soul, they are REALLY SMALL and they are very expensive if you don't build them yourself. Since I'd be building a house in Belize, I didn't want to also be building a house in Oregon—I wanted something quick, simple, less expensive, easy maintenance....ah......a 5th Wheeler. They're quite a bit "glitzier" than really suits me, but they have lots of room, are low maintenance, and I knew the price of a used one would beat that of a Tiny Home by a huge margin—maybe only half as much!

My house plan- 1075 sq/ft
So I started looking for one of those that I liked, and at the same time I began the house plans for my house in Belize.  In 1980 I designed and built my little house in the woods, so I knew how to design a house and draw house plans, and I know what works for me and what doesn't, so this was very doable (and a lot of fun). And my builder was interested in building an earth bag house!  Serendipity!

Delivering my home to its spot
April.  Finally I found a good 5th Wheeler at a price I could afford (less than $20,000) and a friend offered me a place to settle, complete with water, electricity and sewer. 

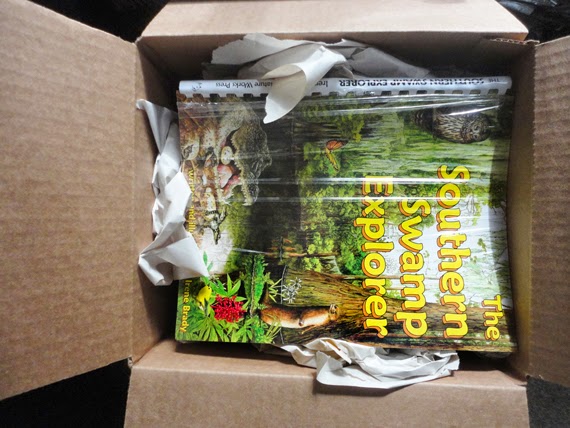
packing a shipment of books
It was 30 miles from "home" but actually, to tell the truth, I was "homeless" now, so I jumped at the chance.
In the meantime I started thinking about selling the printed part (books) of my business, Nature Works Press, because there would no way for me to fill orders from Belize. Besides, it is time to "retire."

I decided to keep the sketch/journal e-book part of the business, and in fact even grow it.  But I needed to find a home for the book end of it.  So I put out feelers on a self-publishing forum. 

the view from my veranda-to-be
Life was chaotic, with belongings scattered all over the place: in two storage units in a nearby town, a stack of stuff in an empty building at the nursery, and the rest in Dan's Cabin, and I needed to return to Belize to begin the building process with my builder.  

So in May I returned to Better in Belize for a week of reconnaissance, conferences with Jorge, and to just sit (and sometimes sketch) on my building site for hours at different times of day to make sure I had planned everything correctly.
Black Orchid and frog in my yard
It was a wonderful interlude, with my dreams taking shape and focus to the accompaniment of crickets, cicadas, frogs (and a visit with a nearby tarantula clasping her egg sac).  

Mama tarantula with 2" egg sac
I had to sit outside the tarantula's entrance for more than an hour before she worked up the courage to come out this far, and the twitch of a finger sent her scrambling back inside.  I don't think I'll be afraid to live with tarantulas in the dooryard. They're real wusses.

Jorge, my Belizean builder

I was pleased to find that I liked Jorge and that we could work together as we prospected around San Ignacio, Belmopan and Spanish Lookout for building supplies and appliances, and outlined my earth bag house with spray paint on the building site.  Jorge is looking pleased in this photo because he had just rescued the orchid (by his left arm) from a fallen tree and replanted it in the hollow stump he's leaning on.

But arriving back home in Oregon,  it was time to reconvene my old life and wait for things to settle down since my house wouldn't be finished in Belize until autumn. Jorge promised to send me pictures taken  with his iPad or cellphone throughout the project. 
Lava Butte illustration

All spring and summer, while this was going on, I was also working on several illustration projects that would appear in nature centers and national forests in Oregon. I did a couple of blog entries about the making of this Lava Butte illustration, then after that I created the Benham Falls and the Benham Bridge illustrations here. 

These were all done at Daniel's Cabin, while the rest of my life swirled about in in total disarray.
Benham Falls illustration
Benham Bridge illustration


It's kind of amazing to me that anything at all could have come out of the astonishingly convoluted quagmire of my overloaded brain, but there they are.  And there was also a huge illustration (40" high) of a Ponderosa Pine which nearly ate my laptop awhile ago when I tried to convert it into a JPG so I could post it here, so it's not shown.  

JUNE  To relax my brain a bit, I drove to Idaho to visit my brother David, who helped me sort out details with regard to the change from Microsoft XP to Windows (Why did they change? XP was a GREAT operating system!), showed me how to use Skype (which will be my only telephone in my off-grid community), helped me upgrade some programs, including Quickbooks and Photoshop, with which I run my business, helped me sort out my laptop and tablet, and showed me how to download ebooks to read on a Kindle program, and just generally soothed away a lot of the angst that had been building up.  

Home in its new spot in a madrone forest
Thank goodness for a generous (and patient) brother!

In early June, Jorge informed me that my house plans had been approved. I was also moving into my new 5th Wheeler.  Dan bought and carted away a recliner and the dinette set which had crowded the interior, so I could start converting the dinette area into an office.

Next, I needed to start planning which of my belongings I wanted to take to my new home in Belize. And I needed a truck. Too much happening! My head was spinning.   

Now, this isn't the end of the story, as I've only gotten us midway through June, and here it is October, so I'll start work on the remaining bit of summer in the next blog entry.  I'm sorry I kept y'all in the dark for so long.  I just didn't have the time or energy to spend on it with all the other stuff going on.  Right now, I'm tapping my fingers while .....but more about that in the next blog entry.  

In the meantime, to assuage your disappointment about the truncated story, I offer you  this delightful little being I discovered while weeding a couple of weeks ago. The tiny jackrabbit toddler (it would fit in your cupped hands) never blinked an eye as I snapped its portrait.  I left it in peace (after about thirty seconds) to make its way in the world after The Giant left.  —Leap through life with happiness, Little Guy!

Friday, December 6, 2013

Step-by-step Watercolor Pencil Painting Part II

Okay, so in my last post I mentioned that I had hit the proverbial wall on part of the painting of Lava Butte. 
I toyed around with trying to turn the highly stylized jaggedy lines I had made to indicate trees into what they should look like.  In #20 here you can see where I practiced on an extra printout I had made for this purpose—it has the identical b/w drawing and is printed on the same paper stock so my results would be the same—but what I had simply didn't look like a sparse ponderosa forest.

After a day of thought on the knotty subject, I realized there was no way to make it work using what was on the paper. It needed to look more like #24, at right.  
I was going to have to turn my illustration into a computer composite of two separate paintings—a background and a foreground—since there was no way to remove the stylized trees from the already painted part.  Fortunately the edge of the lava flow and the forest made an easy transition point.
#20 is a photo of my desk and one of the photo images I was using as a reference on my laptop screen.  (I'd show a better copy of the scene, but it isn't my photo and I don't have permission to use it on the blog.  I don't think anyone would object to this small representation, though).  
This is the size the illustration will appear on the trailhead sign, by the way.  It's printed out on an 8½"x11" sheet of heavy paper.  
To guide me in where to draw the new trees, I held the painting up on my glass door so the light would come through it, placed the fresh sheet in front of it, and very lightly sketched the outline that needed filling in with trees on the new sheet.
#22 shows the original unworkable stylized forest above and my solution to the illustration challenge below.  Every tree has been drawn within the forest outline and given a tiny little trunk. They were drawn very quickly, though, because this isn't a highly detailed picture, and it only took about half an hour to complete the outlines of all those tiny trees.
Before I would go any further, I wanted to practice drawing the  earth between the sparse trees. Using the yellow ochre and cinnamon I had designated in my rough palette originally,  I carelessly stroked the pencil lines vertically, which would not correctly interpret flat earth.  Like flat, calm water, which must always be stroked horizontally, I realized I would have to stroke all that area between the trees horizontally.  I was glad I had not just started out on the actual artwork.
Using #24 (at the beginning of this post) as a guide, I made the trees cadmium yellow lemon on the side catching the light, and cedar green on the shadow side. Each tree would need a shadow on the ground, also, and I experimented with caput mortuum and black in #26, but the caput mortuum made the earth appear too reddish, so I decided to go with black on my final illustration.  

Finally, in #27, you see the trees pretty much as they appear on the final illustration. Now I needed to fill in the earth  and make the shadows.   
On my practice sheet I tried out some black shadows, but they looked way too harsh, so instead, beside each tree I put a little lozenge of warm gray deep. Better! Now the trees looked ready to join via my computer graphics program into one picture.
Scanning the two illustrations into my program, I enlarged the lava butte canvas at the bottom, and pasted the trees from the other file onto a new layer, cutting and erasing away most of the white along the treeline.  Now I could see that the trees were a bit gaudy-looking, being too yellow, so I calmed the tree layer down until it more closely matched the feeling of the lava layer.   The tree layer needed to be smoothly integrated with the lava edge because I could see white outlines where I had roughly removed the white background behind the trees.
The best way to do that was to put a temporary black layer behind the trees to make them stand out, then go in with a small eraser tool and erase out around the trees.  In the image with the black background, I have finished the trees on the left half.  
Once the trees were cleaned up, I got rid of the black layer and smoothed the lava on the lava layer with the clone tool to make sure it flowed nicely behind the trees.  
To give the lava layer some thickness, I darkened the edge where it meets the trees, using the burn tool. 
Look closely at the sky in the image above. As I predicted in the previous post, that color of turquoise blue turned granular during the scan, so I knew I'd have to repaint the sky in the graphics program. 
To do this, I dabbed the color picker in a "good" spot on the sky to select that color, made a very large brush, and painted in the sky a solid turquoise blue.  With a small brush, I went in closer and made sure the sky joined to the horizon smoothly. And finally, with a large eraser tool set very low, I smoothed out the edges of the sky to blend them out to nothing.
Then off it went via email for its debut with the client.
They liked it, with a couple of requests. 
1.  they wanted the sky to be light on the horizon deepening to the deep blue you see in the high desert, making it higher and giving the entire image a more more square ratio.  
2. they wanted the lava butte to be the same color as the lava, and they felt it should be darker.
All of the photos I had referenced showed the butte ALL different colors, depending on how the sun hit it, but I knew it should be roughly the color of the lava.  Still, wanting to get the picture a little more colorful I had put a little caput mortuum into the mix.  My bad.  
The cinder cone first: With the sponge tool set very low so I could work gradually, I desaturated (removed the color) from the black of the cone, being careful not to desaturate the trees, too. Then, with the burn tool set on "highlights" at a very low setting, I gradually darkened the shadow side of the cone, working around the cone carefully to make a smooth transition.  The two fixes only required about half an hour of work, and I was perfectly happy to make them.  Then I sent it off to them (a small JPG through email—the larger TIF file will later be uploaded to the server).
They liked the changes (I did, too, especially the sky), and requested one more: Could the sky be given "corners" to better fit the space on the sign? Sure!  Not problem: working on a copy of the original (just in case I muffed it), and using the clone tool with a very large brush, I cloned the center of the sky, and pulling down a horizontal guideline I simply ran the clone tool to each side along the level line until the entire sky was the height of the center, squaring it off nicely.  I used a large eraser set on very low again to blend off the edges, and sent it back again for approval.

And here it is, the finished watercolor pencil painting, ready to go on the trailhead sign..  
I hope you enjoyed this little jaunt through a watercolor pencil step-by-step tutorial.

And yes, that sky IS a realistic color, and in fact I've seen it an even darker blue.  
In the Oregon High Desert country there isn't a lot of pollution to get between you and the sky. 


Here's a grab-bag of other entries...

Related Posts with Thumbnails