 Okay, so in my last post I mentioned that I had hit the proverbial wall on part of the painting of Lava Butte.
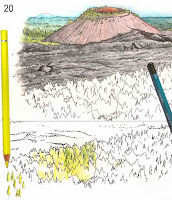
 I toyed around with trying to turn the highly stylized jaggedy lines I had made to indicate trees into what they should look like. In #20 here you can see where I practiced on an extra printout I had made for this purpose—it has the identical b/w drawing and is printed on the same paper stock so my results would be the same—but what I had simply didn't look like a sparse ponderosa forest.
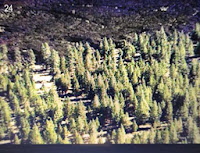 After a day of thought on the knotty subject, I realized there was no way to make it work using what was on the paper. It needed to look more like #24, at right.
 I was going to have to turn my illustration into a computer composite of two separate paintings—a background and a foreground—since there was no way to remove the stylized trees from the already painted part. Fortunately the edge of the lava flow and the forest made an easy transition point.
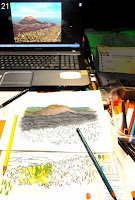 #20 is a photo of my desk and one of the photo images I was using as a reference on my laptop screen. (I'd show a better copy of the scene, but it isn't my photo and I don't have permission to use it on the blog. I don't think anyone would object to this small representation, though).
 This is the size the illustration will appear on the trailhead sign, by the way. It's printed out on an 8½"x11" sheet of heavy paper.
To guide me in where to draw the new trees, I held the painting up on my glass door so the light would come through it, placed the fresh sheet in front of it, and very lightly sketched the outline that needed filling in with trees on the new sheet.
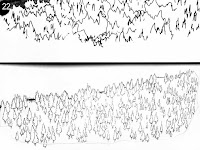 #22 shows the original unworkable stylized forest above and my solution to the illustration challenge below. Every tree has been drawn within the forest outline and given a tiny little trunk. They were drawn very quickly, though, because this isn't a highly detailed picture, and it only took about half an hour to complete the outlines of all those tiny trees.
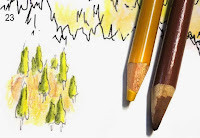 Before I would go any further, I wanted to practice drawing the earth between the sparse trees. Using the yellow ochre and cinnamon I had designated in my rough palette originally, I carelessly stroked the pencil lines vertically, which would not correctly interpret flat earth. Like flat, calm water, which must always be stroked horizontally, I realized I would have to stroke all that area between the trees horizontally. I was glad I had not just started out on the actual artwork.
 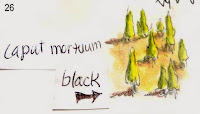 Using #24 (at the beginning of this post) as a guide, I made the trees cadmium yellow lemon on the side catching the light, and cedar green on the shadow side. Each tree would need a shadow on the ground, also, and I experimented with caput mortuum and black in #26, but the caput mortuum made the earth appear too reddish, so I decided to go with black on my final illustration.
  Finally, in #27, you see the trees pretty much as they appear on the final illustration. Now I needed to fill in the earth and make the shadows.
  On my practice sheet I tried out some black shadows, but they looked way too harsh, so instead, beside each tree I put a little lozenge of warm gray deep. Better! Now the trees looked ready to join via my computer graphics program into one picture.
 Scanning the two illustrations into my program, I enlarged the lava butte canvas at the bottom, and pasted the trees from the other file onto a new layer, cutting and erasing away most of the white along the treeline. Now I could see that the trees were a bit gaudy-looking, being too yellow, so I calmed the tree layer down until it more closely matched the feeling of the lava layer.
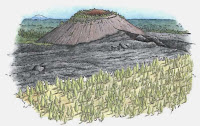 The tree layer needed to be smoothly integrated with the lava edge because I could see white outlines where I had roughly removed the white background behind the trees.
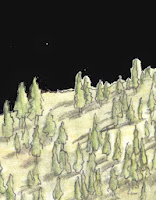 The best way to do that was to put a temporary black layer behind the trees to make them stand out, then go in with a small eraser tool and erase out around the trees. In the image with the black background, I have finished the trees on the left half.
 Once the trees were cleaned up, I got rid of the black layer and smoothed the lava on the lava layer with the clone tool to make sure it flowed nicely behind the trees.
To give the lava layer some thickness, I darkened the edge where it meets the trees, using the burn tool.
Look closely at the sky in the image above. As I predicted in the previous post, that color of turquoise blue turned granular during the scan, so I knew I'd have to repaint the sky in the graphics program.
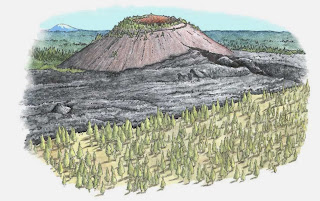 To do this, I dabbed the color picker in a "good" spot on the sky to select that color, made a very large brush, and painted in the sky a solid turquoise blue. With a small brush, I went in closer and made sure the sky joined to the horizon smoothly. And finally, with a large eraser tool set very low, I smoothed out the edges of the sky to blend them out to nothing.
Then off it went via email for its debut with the client.
They liked it, with a couple of requests.
1. they wanted the sky to be light on the horizon deepening to the deep blue you see in the high desert, making it higher and giving the entire image a more more square ratio.
2. they wanted the lava butte to be the same color as the lava, and they felt it should be darker.
All of the photos I had referenced showed the butte ALL different colors, depending on how the sun hit it, but I knew it should be roughly the color of the lava. Still, wanting to get the picture a little more colorful I had put a little caput mortuum into the mix. My bad.
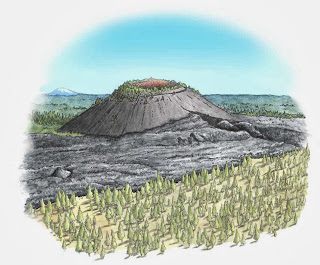 The cinder cone first: With the sponge tool set very low so I could work gradually, I desaturated (removed the color) from the black of the cone, being careful not to desaturate the trees, too. Then, with the burn tool set on "highlights" at a very low setting, I gradually darkened the shadow side of the cone, working around the cone carefully to make a smooth transition. The two fixes only required about half an hour of work, and I was perfectly happy to make them. Then I sent it off to them (a small JPG through email—the larger TIF file will later be uploaded to the server).
They liked the changes (I did, too, especially the sky), and requested one more: Could the sky be given "corners" to better fit the space on the sign? Sure! Not problem: working on a copy of the original (just in case I muffed it), and using the clone tool with a very large brush, I cloned the center of the sky, and pulling down a horizontal guideline I simply ran the clone tool to each side along the level line until the entire sky was the height of the center, squaring it off nicely. I used a large eraser set on very low again to blend off the edges, and sent it back again for approval.
And here it is, the finished watercolor pencil painting, ready to go on the trailhead sign..
I hope you enjoyed this little jaunt through a watercolor pencil step-by-step tutorial.
And yes, that sky IS a realistic color, and in fact I've seen it an even darker blue.
In the Oregon High Desert country there isn't a lot of pollution to get between you and the sky.


2 comments:
One of these days I'll lose my dislike of computer generated art and get into this more. Maybe it is more marketable, but it just doesnt seem very authentic
Hi Iris,
Yeah, I was so entranced by my new land that I've moved here permanently and love every minute of it. I don't blog anymore, because at about the time I stopped for awhile, they changed everything and I could never get back into my Blogger account. Ah well. Such is life.
About the computer generated art, I have done quite a bit of sketching onscreen with a pad and stylus, and it is VERY similar to actually drawing with a pencil or pen. It takes the same skill and concentration, and being a perfectionist, I had a lot of fun enlarging it to super huge and making THAT perfect -- not that anyone besides me ever looked that closely.
Thanks for dropping by to comment.
Post a Comment