I love teaching beginners. There are two kinds:
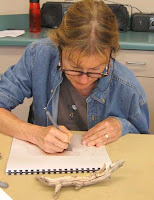 Those who want to draw but are scared to death that someone else will see they can't draw already. They're halfway expecting to fail miserably ~ but they're determined to get out there and try anyway. Then there are those who want to draw even though they suspect it might not be possible ~ but are gung-ho eager to test the waters and don't care what others may say.
I suppose there are nuances of these, too, but most people who pay good money to take a beginning drawing class fall in one or the other.
I love both kinds. I love the bold ones who'll try anything, and I love the tentative ones who need the gentle encouragement. I suppose there's a bit of both of those in me, so I really connect at both levels. Lest someone wonder how a person who is already an established artist (and an instructor, no less!) can feel tentative and fearful at the prospect of an art project, I assure you, it happens to me all the time.
But what I've learned over the years is that just pressing forward with determination and as much fearlessness as can be mustered usually overcomes the barriers.
Anyway, the workshop I held a bit over a week ago had both kinds of beginners. I'm not going to go through all the details of the class process this time. I'm just going to put up a gallery of their wonderful work and let you appreciate. If you want details of what happened in each class, scroll back through previous workshops (or pull down the archives at the top of the page and read through one of the previous ones).
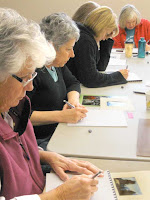
The students assembled themselves around the tables at 9:30am on Saturday, and we had our usual introductions during which everyone tells their name, why they are there and what they hope to accomplish. Below is what they accomplished. Click on an image for a larger view. And remember, some of these artists haven't drawn since they were children!
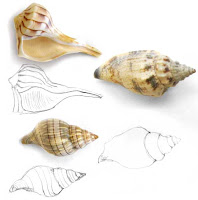


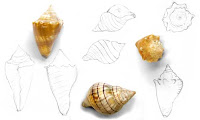
They were only able to work on these shells for half an hour or so before we had to go on to the next exercise, the sequoia cones.
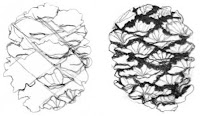
In the cone exercise, I show the students some techniques for drawing conifer cones. Here are some of their results. They worked on them for about 45 minutes in class; later some students took them home to finish.
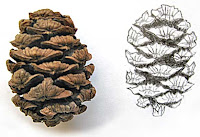 In the pair below, you can see the grid technique the students were using ~ this student tried a couple of different renditions. I apologize for not attaching names to some of these masterpieces ~ I ran out of time.
Now, i
 n case you are wondering what on earth would take so much "time" in getting these pictures up on the blog, take a look at the dark photo. This is what many of the photos look like straight out of the camera. In this particular classroom,
 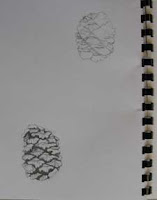 I always photograph under fluorescent room lights plus natural north light on a table near the window. The pictures would be lighter if I used the flash, but that often causes even worse problems of glare and lost details, so I take these dark photos with all their details intact (albeit a bit dark) and fix them up in Photoshop.
If you look at the dark picture, you'll also notice some additional work that had to be done. The two cone drawings were quite far apart on the page. If I had used that picture with the cones in their original positions, it would have had to be very large to show the details, and that would take ages to load on your computer. So sometimes I have to move things around on the page, then crop.
Since I'm intent on showing my students' work as they did it, I have to be careful to not mess with or misrepresent their work. Students
 come to the blog and look carefully at their artwork, and they'd know if I changed it. And they'd surely comment, as well. So I try to make it look exactly as it did when they allowed me to photograph it.
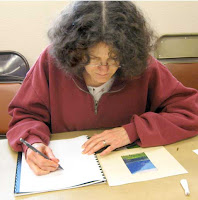
By the time we got to the second day, they were getting quite proficient, and really buckled down to the serious business of rendering their landscapes. An additional student joined us on the second day ~ she had to miss the final day of the class she had attended a few weeks before, so I'd told her she could attend the day she missed this time. She fit right in. We used the morning to learn how to show tree and shrub forms, then texture them.
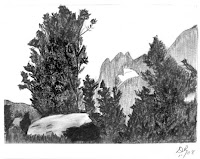
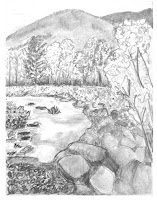
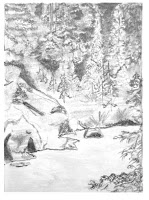
In the final landscape exercise, copying a photo landscape onto their page without any aids, they're not only trying to get the proportions right, they're having to translate and create their own textures to show what's in the landscape: trees with various sizes and shapes of leaves, rocks, water, distant mountains, etc.
 Having practiced this with a photo, they will now have enough skills to take on an actual landscape outside with a degree of confidence.
[You hear that, dear students? I hope you go out VERY soon to practice this, or else the heebeejeebees will getcha and you'll be afraid to try. Just get out there and DO it! If you feel nervous about it, come back to this blog and look again at the marvelous landscapes you produced in class. That should encourage you.]
The landscapes below were produced by a bunch of ordinary people (heck, who's ordinary? Let's just say they're people who worked very hard and had phenomenal success because of it.).
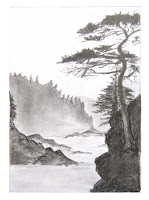
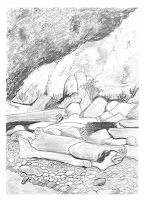
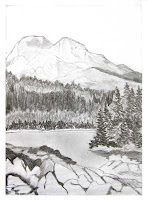
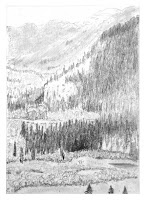
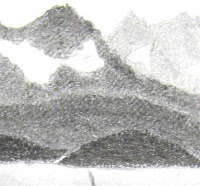
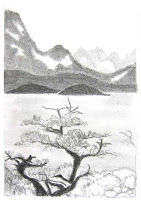
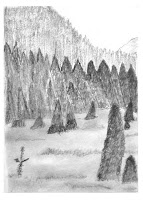
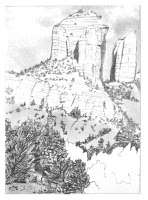
I'd like to point out something in Sandy's landscape (the two left-most pictures in the bottom row above). Sandy did her drawing not in a pad but on a single sheet lying on a textured table ~ with interesting results. I didn't notice until she was nearly finished that the hills and mountains, which she had darkened with heavy pressure, had picked up texture from the table surface beneath. Since it was a serendipitous texture, it made the trees look great. If you click on the enlargement you may be able to see what the texture did for the natural scene. Cool, huh?
So that's it for this class. Students, ya done good! This coming weekend, for the Nature Sketching Details class, I have a couple of returning students from this Basics class who plan to continue their education. I'm looking forward to that a great deal.
By the way, I put up my new Workshops 2009 webpage this week. I think this one is a lot easier to use than the 2008 page. I'd love feedback on it if you want to visit and let me know what you think. Any ideas for a better layout or way of doing things (or if I forgot something) will be accepted with good cheer. And if you've been waiting for a newsletter with drawing tips, I'll try to get that out soon. It's on my list.
So, until next workshop, just keep thinking about what these beginning artists did with just a few hours of guidance ~ and think what you might be able to do if you apply yourself! Hope to see you in class

4 comments:
I hope your students DO read your Blog! I want each of them to know that their artwork is incredible!! Those shells and pine cones are really beautiful. But those LANDSCAPES!!! Wow!!! Each of them deserves to be framed and put up on display where everyone can see them. Or even framed and given as gifts. They are all beautiful! :)))
Hi Bonny,
I couldn't agree more! I think sometimes students think the instructor "has to" tell them their work is good, kinda like Mom tells her kids they're wonderful. So here's a good, unbiased opinion from someone they don't even know. Thanks EVER so much!
I just emailed them all to tell them the blog was up, giving them a link to click (I always do that so they can come look). I hope they're as proud of themselves as I am!
Cheers,
Irene
I will keep your new article. I really enjoyed reading this post, thanks for sharing.
www.gofastek.com
you've got an ideal blog here! would you wish to make some invite posts on my weblog? casino bonus
Post a Comment