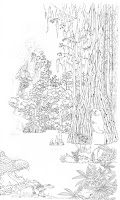
 The cover is getting there! Today I hope to finish the inking on The Southern Swamp Explorer cover. Here is most of what I have done (the scanner plate on my printer/copier/scanner is too small to take the whole scene ~ later I will scan it in sections and stitch it together in Photoshop, but right now that's not imporant). I have actually gotten a little more done already, but didn't scan it in yet. The butterfly is finished, but not the owl.
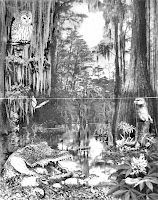
I re-posted the original rough draft here for reference.
You can see, if you click to enlarge the pen-and-ink artwork,
 that I don't slavishly follow the pencil marks unless it's important (as on the alligator or warbler details). For the trees, for instance, I use the pencil marks as a guide, but just build the trees as I see fit ~ sometimes an extra branch is needed, or a texture I am building doesn't logically stop where the pencil-tracing line does.
The lines in this ink drawing are a bit confusing, as I haven't shaded anything with the ink. I did make the right-hand edge of many of the confusing tree trunks slightly heavier, though, as a guide for when I start painting. It really makes a difference.
You'll notice I haven't done anything with the water. The water is a puzzle. Inklines don't lend themselves to water very well, and it would take me quite awhile to psych things out. I may fudge the water/reflections/ripples/color by leaving them till the very end and doing the water parts in Photoshop. Gasp!
I used to be a purist, wouldn't have even considered doing that. But I've gotten considerably more practical as years have gone by. Sure, I could make that water look good with ink and watercolor pencil and paintbrush, but it would take quite awhile and I don't know if I want to put that much effort into it, just to be macho, when I could ace it in with some creative Photoshop work, chop-chop. After all, that takes skill, too. So we'll see what transpires.
- To do the water in Photoshop, I would copy the trees in the background, paste the copy on top of the original drawing in a new layer, turn it upside down, darken it, tweak it to fit, erase parts of it where the foreground comes in front of it, then sweep the smudging tool back and forth to make water ripples.
And today I must finish the write-ups for the two new 2-day workshops for the North Mountain Park Nature Center catalog. When I get them done, I will post them here.

No comments:
Post a Comment