Vacations are BUMMERS!
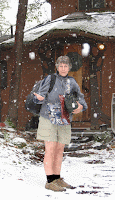 Well actually, the bummer is when you get home from Hawaii in your sunglasses and safari shorts and tanned knees and turn into an instant icicle with snow globbing up on your cold blue knees!
I'm exaggerating just the tiniest bit....I was glad to see Daniel again, and to have a chance to share with him some of my best adventures as he took time off from work to drive me to my house. But that stinker was chuckling as he took this picture of me in front of my house (if I cut him a little slack I have to admit I probably would have been chuckling wickedly, too, if I were him).....
But it ain't FAIR!
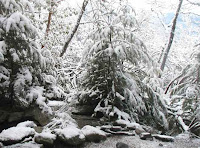 I've experienced a blizzard with 3" of snow, 60mph winds, downed trees, a 36 hour power outage and about 3½" of rain in the paltry thirteen days I've been back, and it has me vowing to retire early, move to Hawaii and live a life of ease, doing a painting every few days to sell at a nearby gallery to pay for my coconuts and margaritas....... ah, such are my dreams.....
Actually, today I wanted to show you how my photo of the orchid turned into a watercolor pencil painting in my journal.
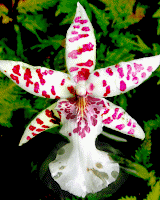 I'm going to show you how I did it, step-by-step, so you can see if this is something you might want to try yourself (if you aren't already an accomplished watercolor pencillist). Be sure to click on the pictures to see them close-up. (Does anyone happen to know what kind of orchid this is? Even just the genus, or maybe a common name?)
The orchid of which I took the original photo in the Hawai'i Tropical
 Botanical Park wasn't perfect and it showed raindrops and some wear. I decided to not show blemishes or water drops on my finished painting.
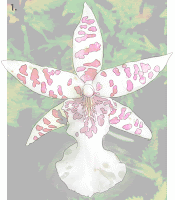
Since my main aim was to play/practice with the watercolor pencils, I didn't make any effort to draw a freehand outline. I brought up the photo in Photoshop, made a new layer, and traced the orchid to create an outline drawing (#1).
Then I printed
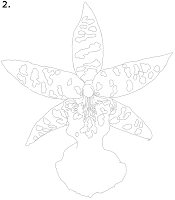 out just the outline drawing (#2). Since I wanted the painting to be on the same paper as the rest of my journal, i.e. heavy paper that would take water without buckling or pilling, I pulled a sheet from the back of my journal and ran that through my printer to print the outline on.
Using just the pencils in the 12-color Staedtler set
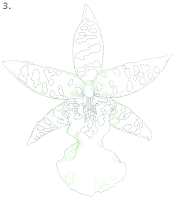 (I'm not promoting this brand particularly ~ it's just one I got cheap because the metal box was bent. But these pencils do a fine job, as do many other brands), I chose a lime green to start out the color (#3). You'll notice that there's not a lot of color there, because when it is wet, the color will spread and intensify. I tested out what it would do by making some trial swatches at the bottom of the sheet.
Next I wet the green,
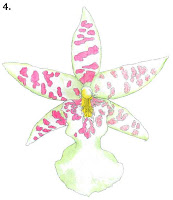 and when that was dry I put in the yellow center then started adding spots (#4) . Always start with muted background colors then put bright colors over them. If you forget and start with the bright colors (a pinkish red, or cerise, in this case), you'll have to be extra careful not to let them bleed as you try to mop in a subtle background around them.
Let wet areas dry before putting on more pencil if you want to control the colors even a little. If you pencil into a wet areas, it will make a really sharp mark that won't blend in very well with the brush. Experiment in your trial swatch area.
Next it was time to finish the cerise markings (#5),  but on looking at the photo I decided to use a more orangish red to tone down the pink. I also added in some blue to give shadows, then wet it again.
It was looking rather pale against the white background, so I decided to make it pop out of the page with a contrasty black/blue/green background (#6). I blended this in really dark with all three pencils at once before adding color. Only part of it was added here (in #6), and I wet it to see how far out it would extend.  Actually, I didn't have to add any more in the darkened background areas since I found I could pull the dark color sufficiently far away from the center with the watered brush.
I finished up with the remaining background areas (#8)(oops, there never was a #7!), and painted in a bluer contrast in the center areas. For these areas, I've just wet my brush and dabbed some color off the pencil point and painted that on.
I  didn't try to copy all the ferns and leaves in the background of the original photo, since they would have drawn attention away from the orchid. And I didn't add the storm damage on the lower flower lip, either. Here's the photo again, to check it against.
If you'd like to try this as a tutorial, you can click on drawing #2 and copy and paste it to any program that will print it out. MSWord would work.  Print on very heavy paper with some tooth or roughness to make it work best with water. Then color your own version!
In fact, you can sit at your computer, click on the link to get the big picture, and see right in front of you exactly how this orchid was done, step-by-step (and try your own flourishes if you prefer ;^)
When I was finished, I wanted to put the orchid painting into my journal in the correct spot, right after the page with the ti leaf, so using a pair of fancy-edge (scrapbooking) scissors that make a really classy torn-looking edge (check it out on the enlargement!), I cut out the orchid with about a 3/4" margin, watered down some Elmer's glue with water, used a big brush to paint the glue on the back of the painting, pressed it onto a fresh journal page from the back of the journal along with a printed-out photo of the orchid, and pressed them flat under several books for an hour or so.
Then I removed the journal page from the journal with a sharp scissor snip behind every coil in the binding. If you just tear out the page, it creates a rough edge that won't press back into the coils and stay properly ~ but if you snip it out and press it very gently into its new spot, no one will even notice it was added later, and it will stay in place. Using this method, the orchid appears in the journal across from the Botanical Garden entry as it should.
So there's your art tip for the day! I hope you enjoyed looking through it as much as I did making it. This is the sort of hands-on artwork we do in my workshops, and in fact, we'll be painting this very orchid (or one much like it) in my Nature Journaling/Sketching Workshop in Costa Rica next month. Hope you can join us ~ there are still a few openings.

No comments:
Post a Comment