 Normally I have a lower limit of five, but when three signed up I decided to give it anyway since it was the first run of this particular workshop ~ one I had split off from the beginners' class in order to spend more time on details and watercolor pencils. [remember to click on an image to see a larger version]
So it was a teeny-tiny class, and I discovered the first morning that I already knew everyone! Helene was from the Basics class from two weeks before, Jackie was from the Journaling class I gave in September at the Siskiyou Field Institute, and Chris had been a fellow student (lonnnnnng ago) at Oregon College of Art in Ashland (OR). That made it a special treat for me, and fortunately, they all seemed to like each other.
This Intermediate class offers a more in-depth look
 at pencil techniques, using nature as a model. I emphasized the nature aspect with the new cover for the first day's workbook ~ sketches of red fox pups which I sketched at Wildlife Images, a nearby rehab center.
Starting out with an intermediate class with previous art experience was great fun, as we could skip much of the right-brain warm-up exercises. I enjoy those exercises,
 but they take awhile, and being able to jump past them gave us lots more time for drawing. Another difference is that with some experience under their belts intermediate students need less guidance, so they can select their subjects instead of everyone doing the same one.
DAY 1
After some instruction on making internal right-brain templates, and discussions and experiments with drawing fur, eyes, seashells, leaves, and pigeons, they settled into their day's project: to draw and shade a subject of their choice from the box of goodies I had brought.
One
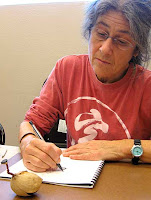 especially nice thing about a small class is that it has a very intimate feel. With just four of us, I could sit across the table from the entire group and we could watch one another work and I could demo a technique which could be seen with ease by everyone as I did it. Demonstrations are always a minor problem ~ I wish I could invest in a projector like the one I used to use in my scientific illustration classes as SOU. The camera picked up the tiniest detail of a demo and projected it onto a screen or monitor which could be seen by the students even better than if I had been showing them one on one. But I don't have one (they cost a small fortune),
 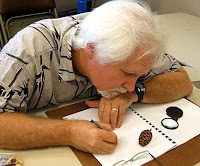 so, as nearly all art instructors do, I generally make do with walking around the classroom with results, working on the blackboard, or repeating the demo for several different groups.
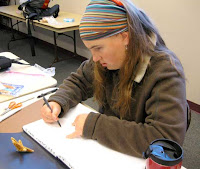
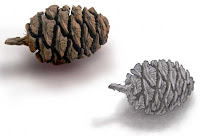
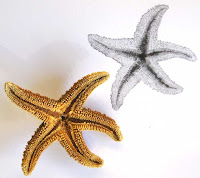
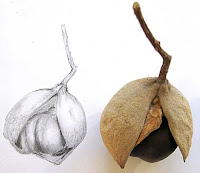
Jackie chose a seastar, opting to tackle the challenging underside instead of the topside. Helene selected a buckeye pod and seed, and Chris decided to try a sequoia cone.
 Chris is a graphic designer in real life, and was taking the class to get back in touch with hand-drawn art as opposed to computer rendering. (As a person spending a LOT of time at the computer designing books, and workbooks for these classes, I sure understand THAT.) He became entranced by the amazing design of the sequoia cone after examining it carefully with the magnifying glass, and had to force himself to blur the clean design lines
  with shading.
The day ended with some good beginnings on their projects, and they took them home to finish. Here's Jackie the first evening, hard at work on her homework seastar.
DAY 2
The second day of this class is devoted to watercolor pencil painting, but before we began we admired and critiqued the homework ~ an exciting session with great results to show.
 Nice, huh?
As always, I had the student whose work was being critiqued explain what he/she did and didn't like about his/her artwork, then the rest of us suggested improvements or techniques that might make them even better.
After the critique, we got right down to working with the watercolor pencils. On the agenda was experimenting with color blending on a color wheel in the workbook, applying washes, trying out techniques unique to watercolor pencil renderings, the care and feeding of the waterbrush (filling the barrel with water constitutes feeding, wouldn't you say?), and other techniques.
Just to get the strokes

 ~ both pencil and paintbrush ~ down, we practiced on my usual orchid. Maybe I should work up another demonstration for returning students, as this was Jackie's second try at that orchid. However, I've painted it any number of times now and I haven't gotten tired of it yet ~ I find that I learn something new every time. So it may be okay. Here are their orchids in progress.
We also tried drawing a eucalyptus seedpod with ink, and using watercolor pencil over that. I
 discovered that the pens I'd selected weren't as waterproof as I'd expected, with a tendency to run ~ but that coincidentally gave us interesting effects with the seedpods and later drawings, so it was a useful experience anyway. Plus, it's a great
  object lesson in choosing the right pen if you plan to do a watercolor pencil painting over it..... These were razorpoints, and I think I'll just have to bite the bullet and fork over the moolah for micron pens. These were roughly 40 cents apiece, whereas the micron pens are $3-4 each.
Just before lunch I brought out some outrageously gorgeous orange, yellow, cream, chartreuse and deep green gourds I'd picked up at the market the night before. I had the students draw them with a modified contour technique in ink to free up their sketching moves a little. The results
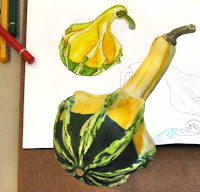 were loose and cheerful, and appropriate since I knew we wouldn't have time to do greatly detailed jobs on the gourds ~ this technique would make even an unfinished gourd look great.
After lunch, we did a short exercise on foliage techniques, and
 I showed them how to quickly and easily show light and shadow, sunlight and shade on foliage masses, then I turned them loose to do what they wanted with all they had learned so far.
Jackie continued on with foliage, while Chris and Helene decided to finish their gourds, and while we didn't have time to do
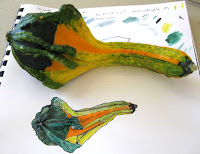 justice to those beautiful things, the results were fresh and vibrant, and the students were happy. So was I.
As always, I was sad to see the class end at 2:30. The evaluations at the end (which they filled out in exchange for a chance to win the raffle of one of my books) produced encouraging comments:
"Though somewhat familiar with the tools and the exercise of sketching, I found that this class gave me some valuable new perspectives (and tools) for going at my artwork. A "gift of seeing."
"This intermediate class is chock full of information on techniques, stylistic shortcuts, etc. The color component is an exciting and wonderful addition. Instructor covers techniques fully. Use of pens are interesting aspect. I feel like I can obtain the materials and feel confident to begin drawing with added color."
I also got some good critique on the class. Here are some of them:
"I thought there might be a landscape component,"
and
"I'd like a brief outdoors session,"
"thicker [workbook] paper would be nice,"
"...with the critiques I would have liked to hear from the rest of the class more."
So, as always, I have areas to improve. The thicker paper in the workbook is easy. I'll have to give some thought to the outdoors part ~ it is a time consumer and cuts down on teaching time, so THAT might bring dissatisfaction.
At any rate, it was, overall, a good class and I think my students would agree. Hey students, chime in with a comment if you like. It's always cool to get comments from the students ~ particularly if you disagree with something or want to add to the story.


 Now I must clean the house for the house-sitter and make her a list of what to do in emergencies. (and hope Jesse doesn't pounce on her like he did the last house-sitter). Jesse says he will get along just fine without me, and he has already hung his stocking (in progress, at left). Well!